Last Updated on October 21, 2023
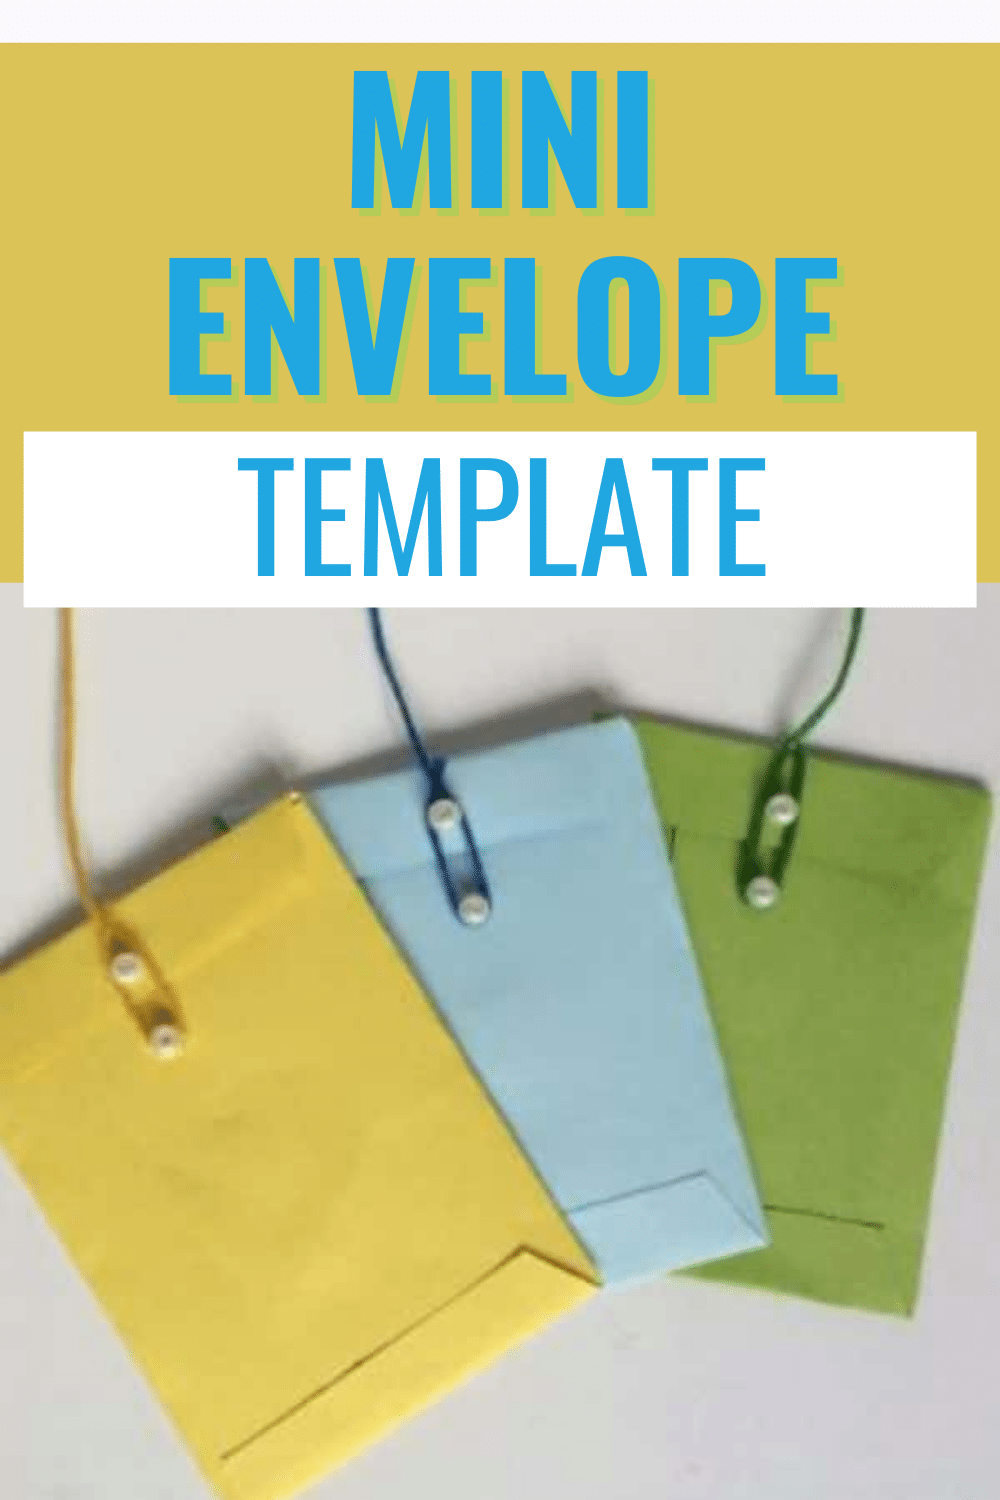
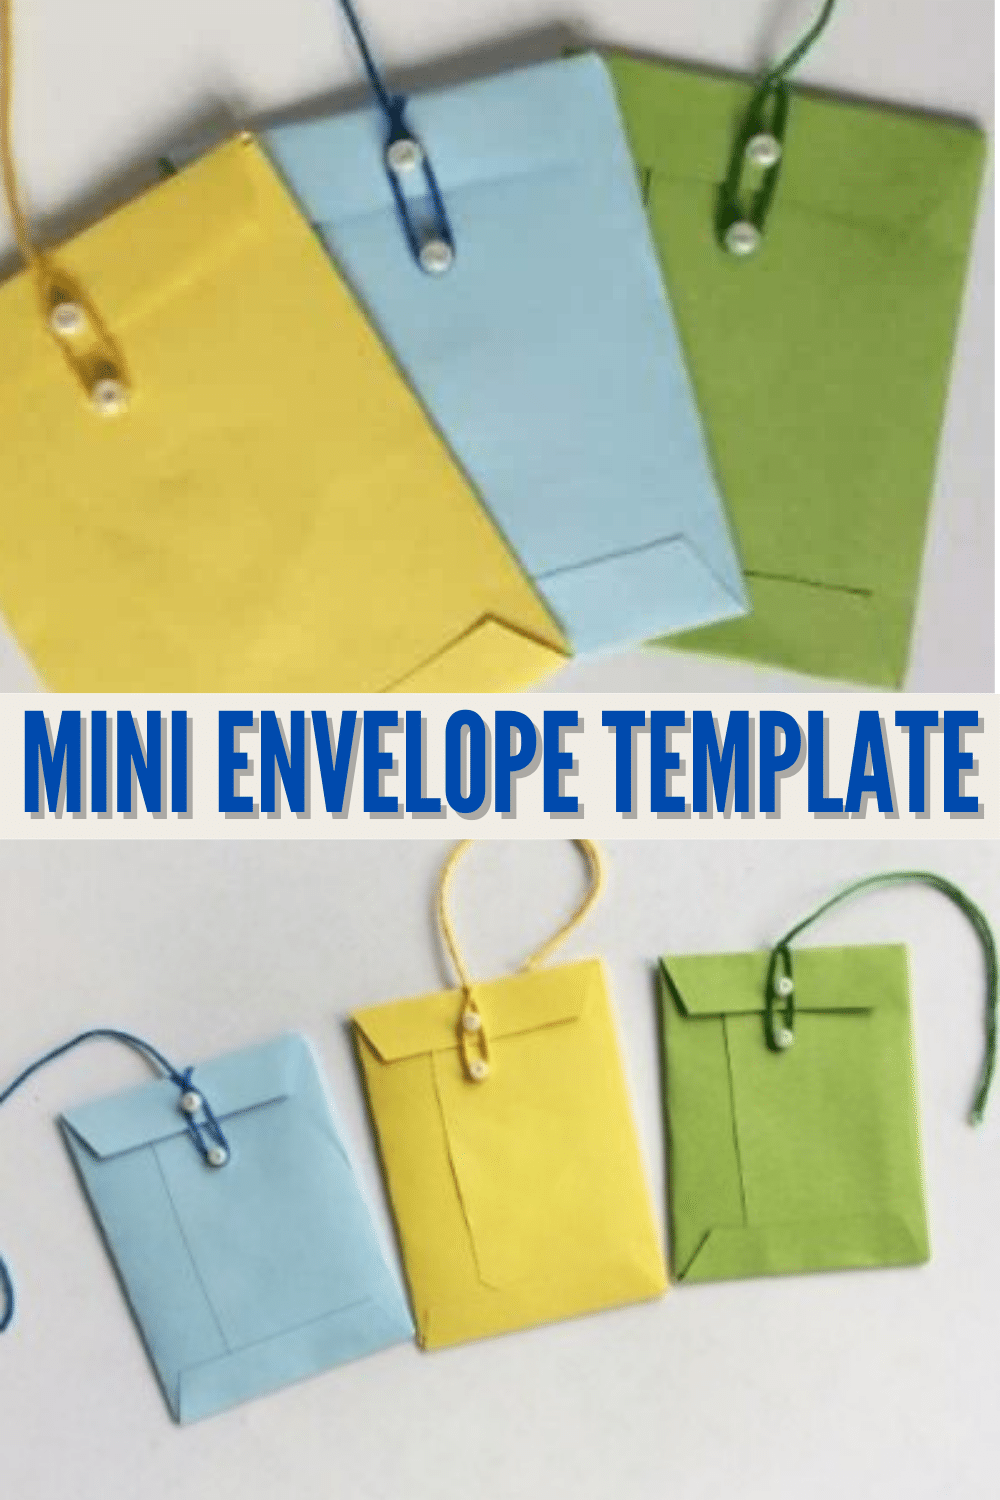
This mini envelope template is so easy to use. You will have adorable mini envelopes ready to go in no time. You will be amazed at how many ways you can use a tiny envelope!
HOW TO USE A MINI ENVELOPE?
If you have never used a miniature envelope you may be unsure why on earth you would want to take the time to make some with this mini envelope template.
There is something adorable about tiny objects and envelopes are no different.
Here are some ideas on how to use mini envelopes:
- Store a key in the mini envelope and label it.
- Keep rare coins in mini envelopes and label them so you know what you have.
- Store a lock of hair from your child’s first haircut in a tiny envelope and place it in their baby book.
- This is a great place to keep a lost tooth!
- Mini envelopes are a wonderful embellishment in scrapbooking.
- A tiny envelope would be perfect if you are sending someone flowers.
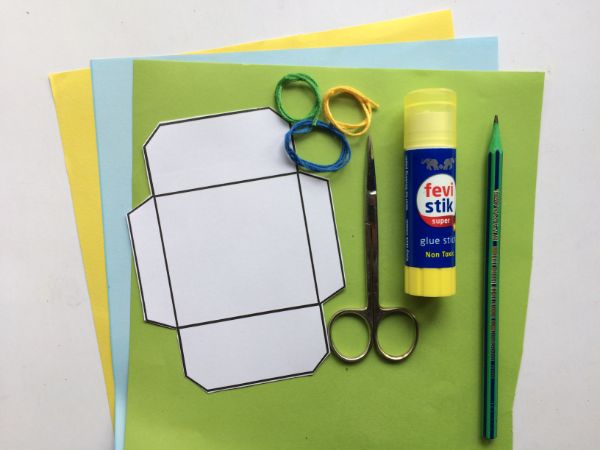
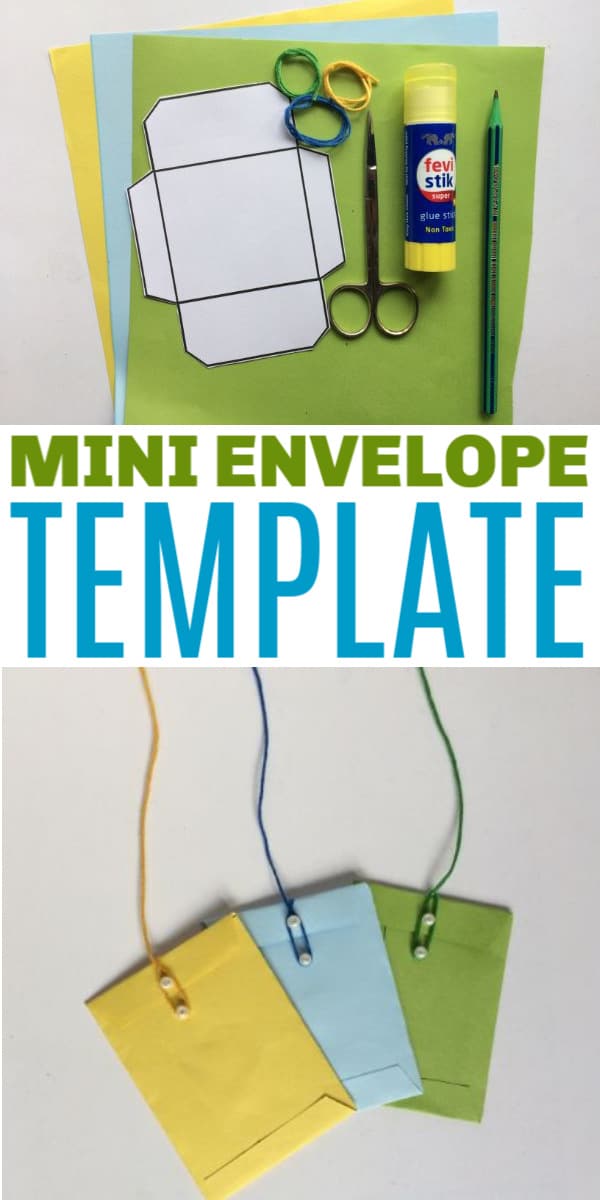
SUPPLIES NEEDED FOR A MINI ENVELOPE
There are only six supplies needed for this envelope project. Most of these are items you already have around the house.
- Colorful paper

- Glue stick or other paper glue
- Pencil
- Scissors
- Beads
- Colorful floss, twine or very thin ribbon


HOW TO USE THE MINI ENVELOPE TEMPLATE
This is one of the easiest DIY projects I have on my blog! If you can cut and use a glue stick then you can make a mini envelope! I love simple projects and kids can help too.
STEP ONE: PRINT TEMPLATE
The first step is to print off the mini envelope template.
Fill in the form below to get the template.
I would suggest you print the template on the colored paper you want to use for the envelope. It will save you the time of having to trace the template!
Printable FAQs
Fill in the form above. After you submit the form, you’ll receive an email from “Wondermom Wannabe” with a direct link to the printable. If you do not see the email in your inbox within a few minutes, check your spam folder.
The most likely place will be in your computer’s Downloads folder. You can also select “Downloads” in your browser menu to see a list of your downloads, then simply select “Show in folder” below the file name to see where it is stored on your computer.
You’ll need a program that supports PDFS, like Adobe Acrobat (which is free). Open the program, click File > Print. Select your printer and set the number of copies you want to print. Double check your print preview, then click print.
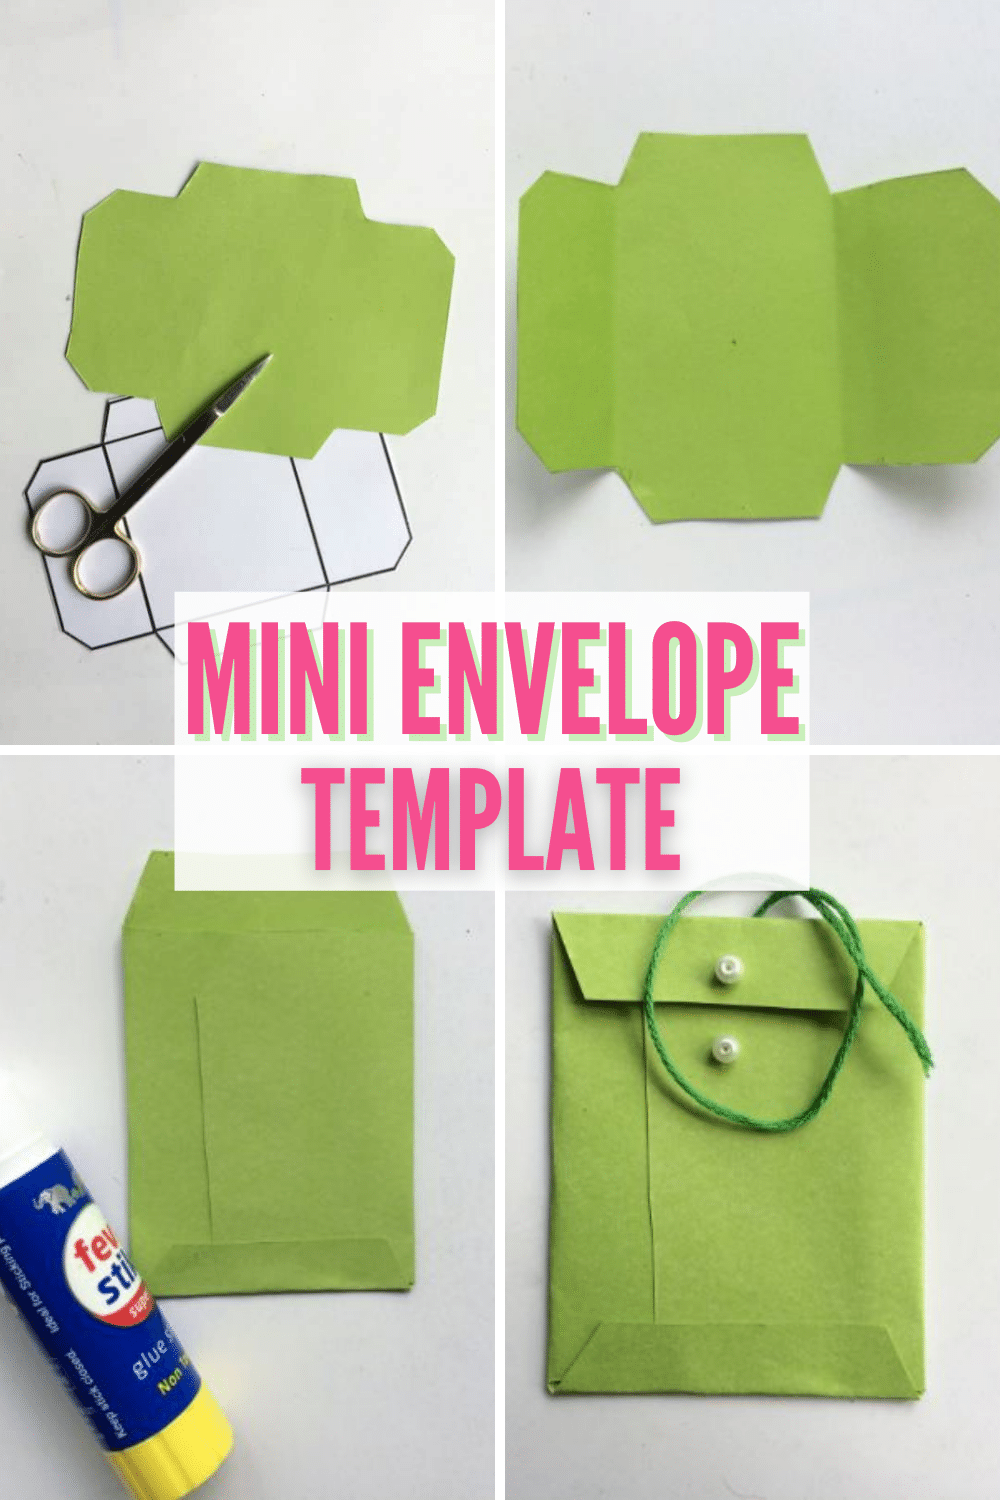
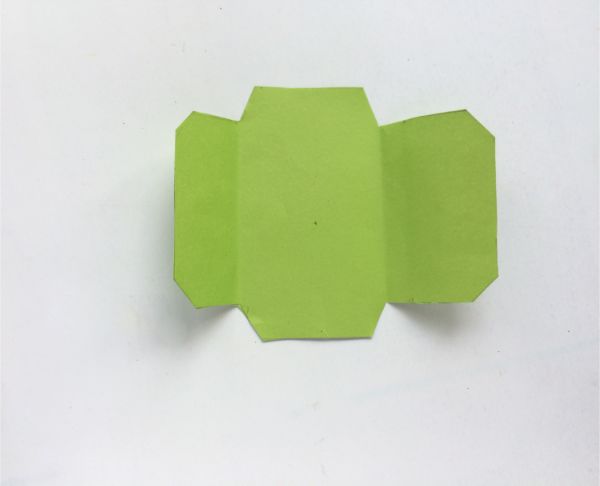
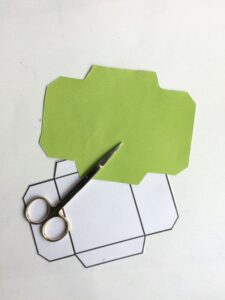
STEP TWO: CUT

Would you like to save this?
Now that you have the template printed it is time to cut it out.
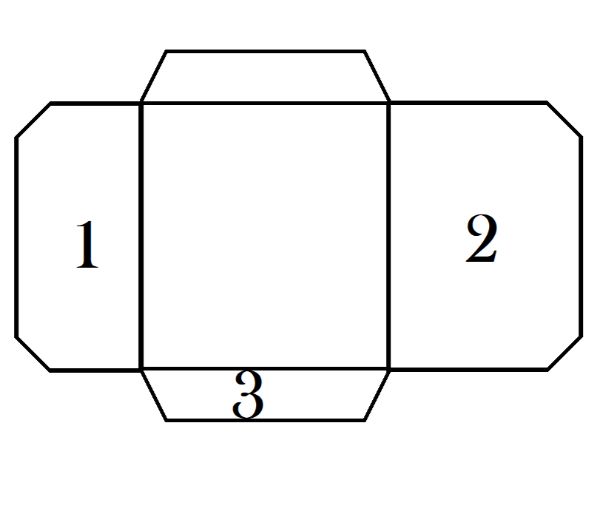
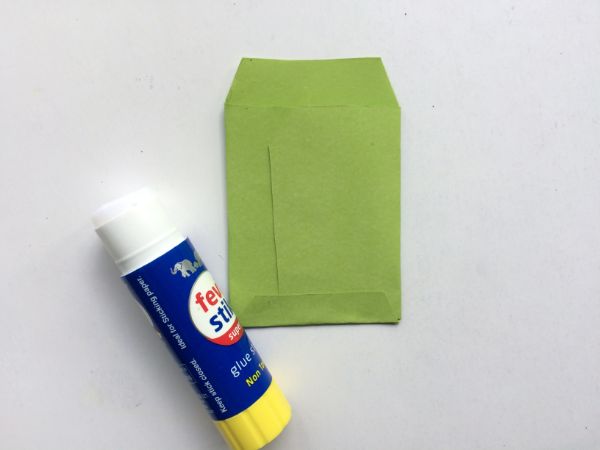
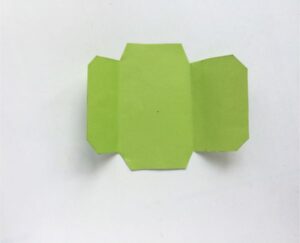
STEP THREE: FOLD
The template has numbers on it to make it easy to fold this correctly.
Fold “1” then apply some glue on top of it. Then you will fold “2” over it and stick it with “1”.
Next, you will fold “3” and glue it to complete the basic envelope.
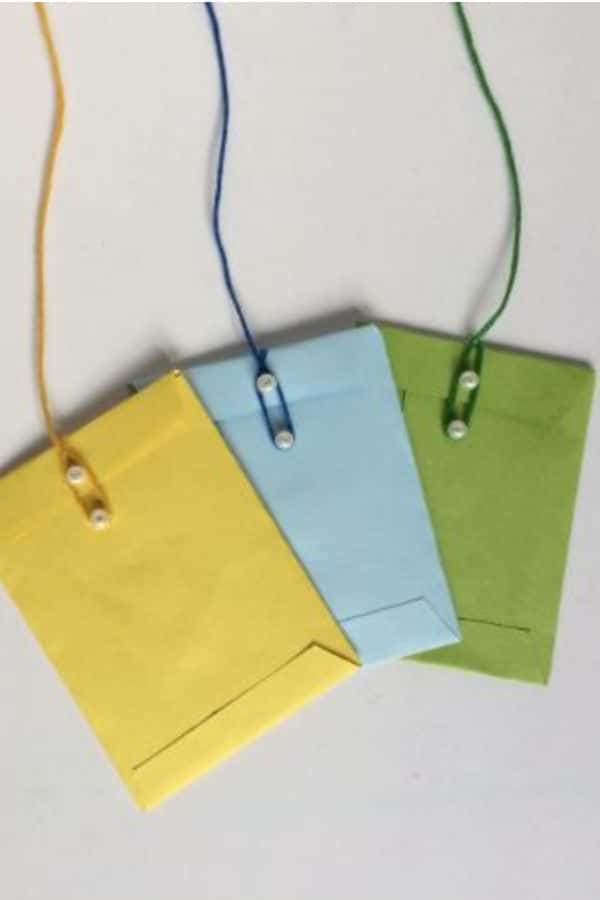
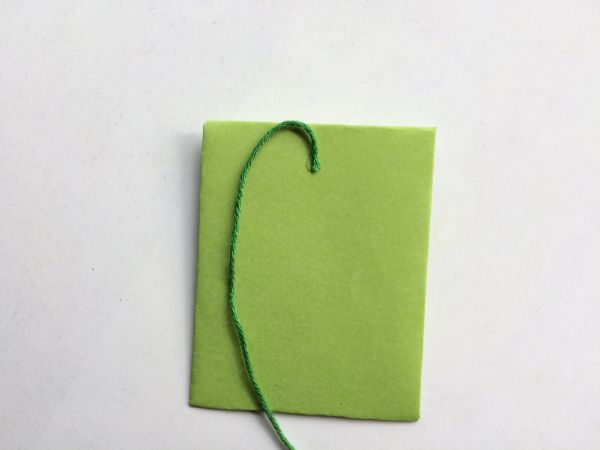
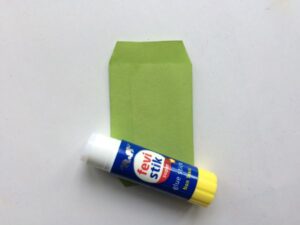
STEP FOUR: ADD STRING
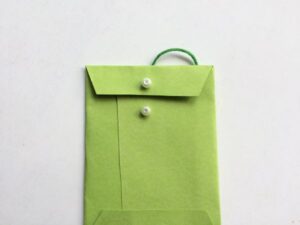
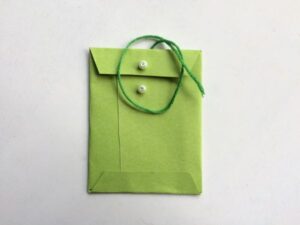
It is time to add the string or floss you are using. This will allow you to clasp the envelope.
Cut a 4-5 inch long section of string and glue it to the back top portion of the envelope.
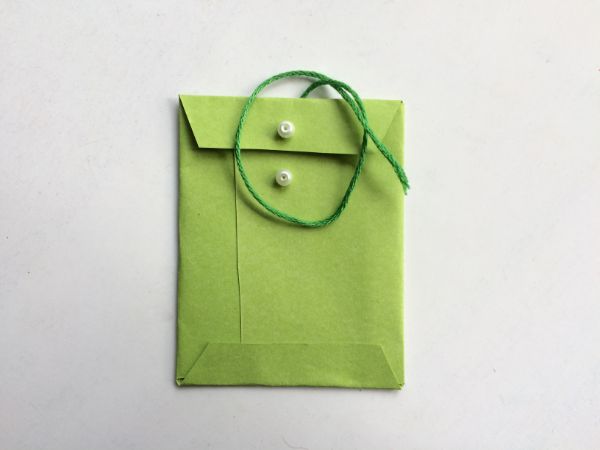
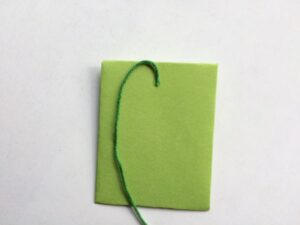
STEP FIVE: ADD BEADS
Take 2 very small pearl beads. Glue one on the middle top part of the envelope and the other on the middle of the envelopes top fold.
This allows you to bring the string around the front and loop it around the beads for a cute closure.
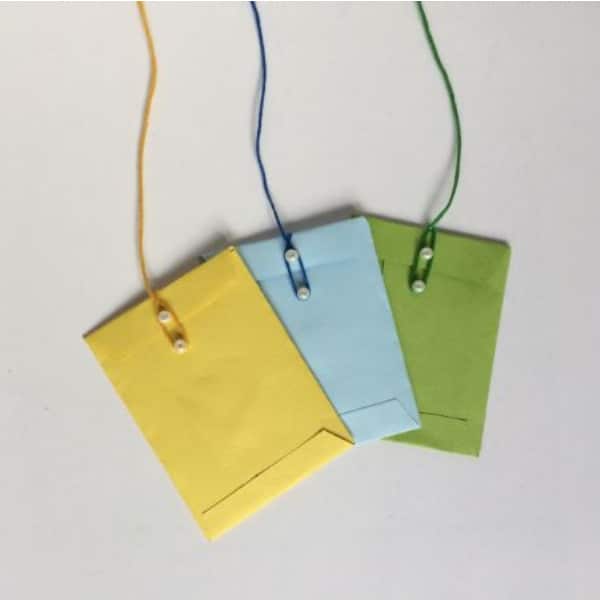
All you have left to do is decide how to use these around the house.
PRINTABLE MINI ENVELOPE TEMPLATE
You can download and print off these easy instructions and supplies on the card below.

Mini Envelope Template
Equipment
- Scissors
Materials
- Colorful papers
- Paper Glue
- Pencil
- Scissors
- Beads
- Colorful Floss, String or Thin Ribbons
Instructions
- Cut out the envelope using the template.

- Fold the envelope according to the numbers given on the template.

- Fold "1" then apply some paper glue on top of it. Then fold "2" over it and stick it with "1".

- Fold "3" and glue it to finish the envelope.
- Take a 4-5 inches long floss and glue it on the back top of the envelope.
- Take two pearl beads. Glue one on the middle top part of the envelope and another on middle of the envelopes top fold.
- Bring the floss on front and take it around the beads. Then tie a simple knot with it.

If you loved this free printable be sure to check out these other great printables:
Don’t forget to PIN this for later!

Thank you so much for sharing these!
You’re welcome! I hope you have fun making them. Thanks for commenting.