Last Updated on September 16, 2024
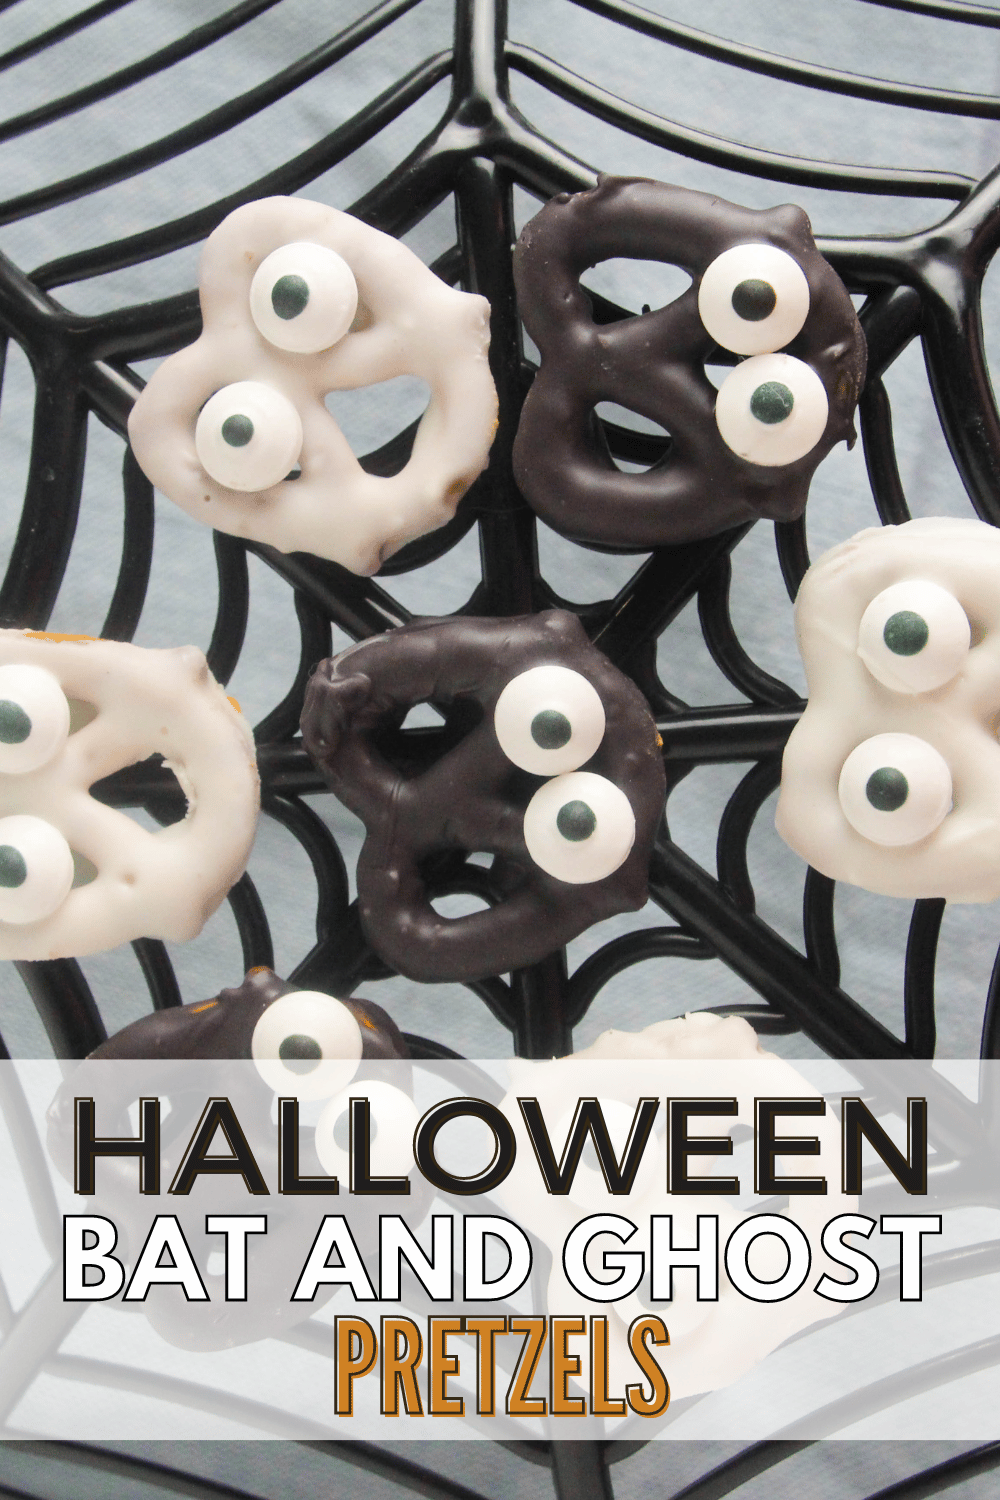
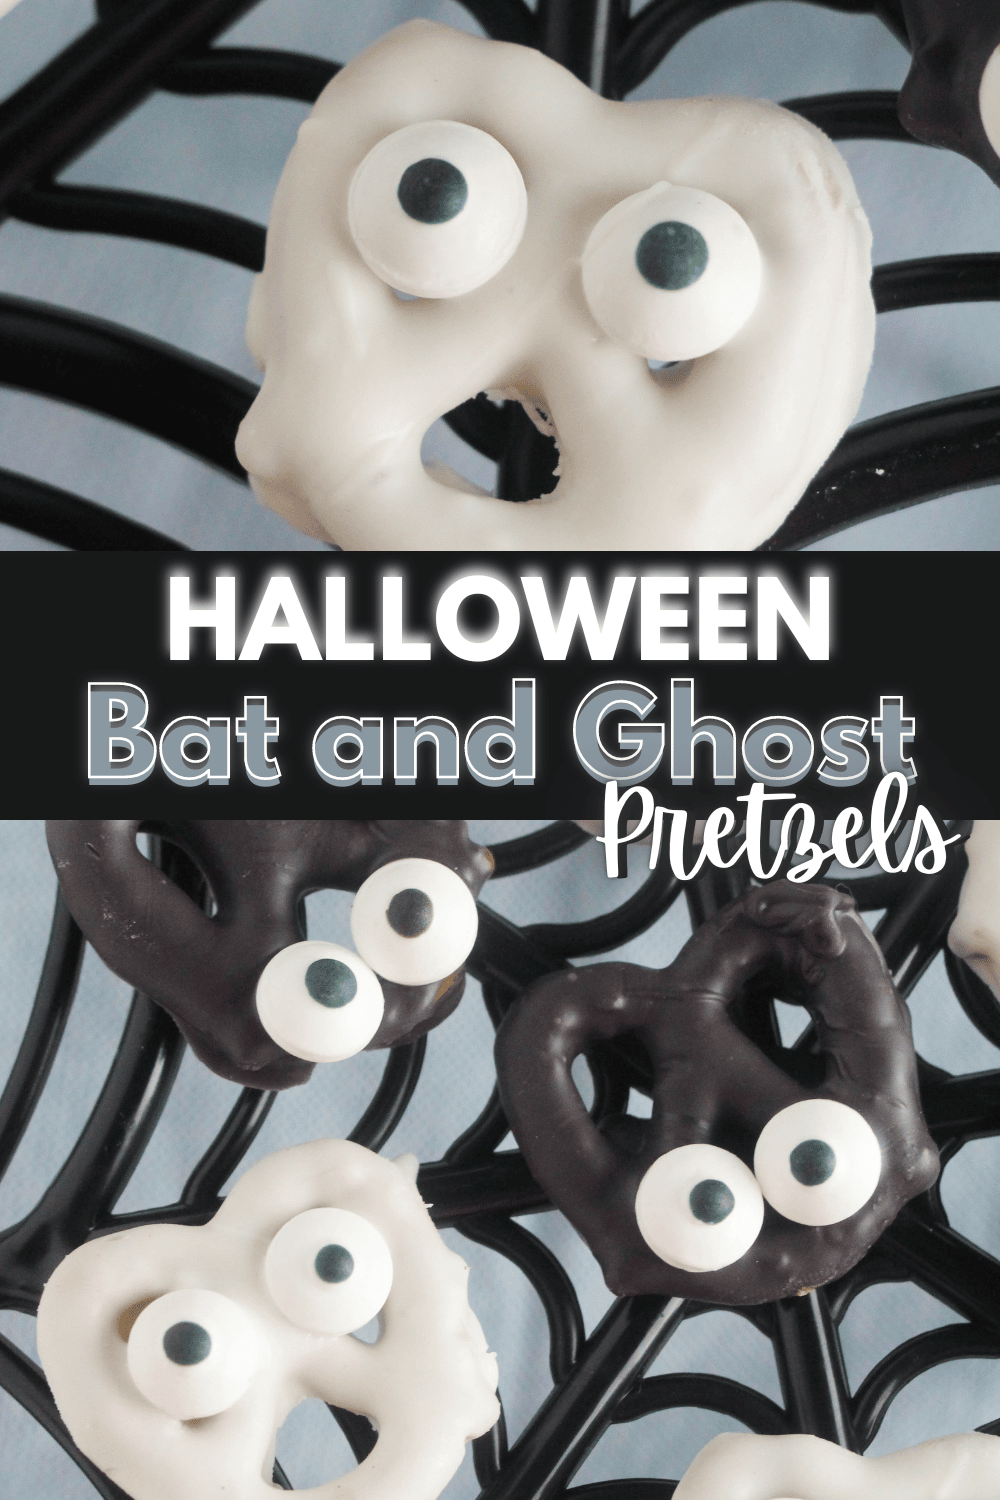
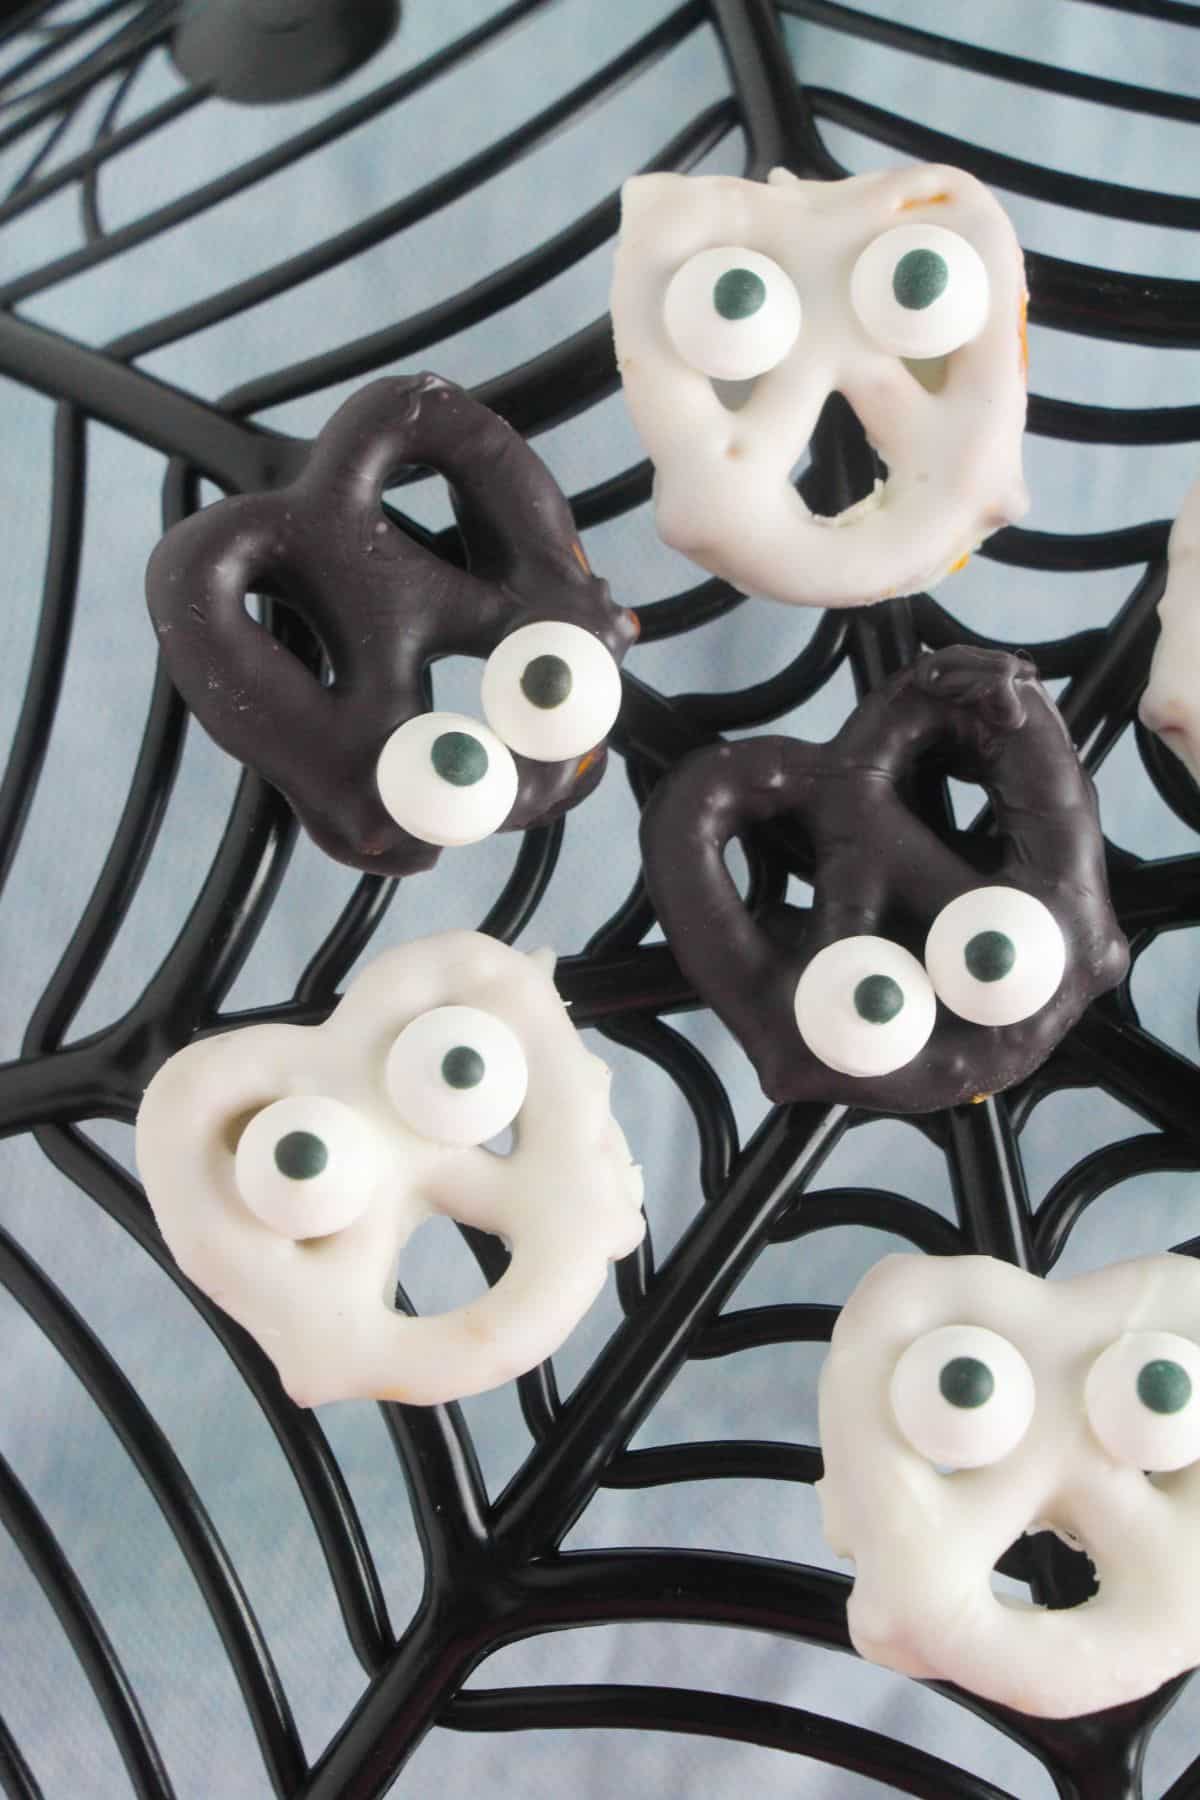
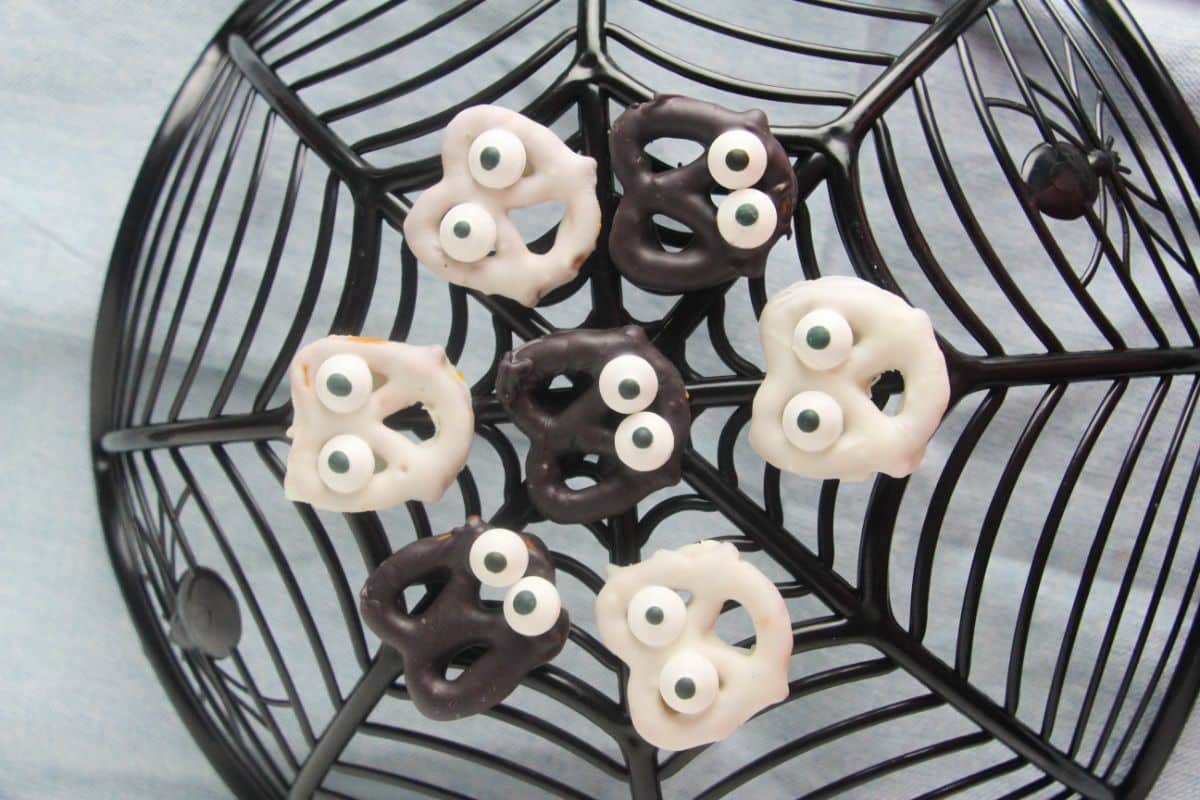
These Chocolate Covered Halloween Pretzels are so easy and fun to make! All you need are a few ingredients and a little bit of time and you will have adorable bat and ghost treats that your kids will love.
If you love festive Halloween kid-friendly snacks then this is the recipe for you. These chocolate-covered pretzels are great for Halloween and always a hit at our Halloween party.
Jump to:
Is it just me or does it seem like Halloween must have been masterminded by a really smart kid? It has all the elements of things kids love — playing dress up, free sweet treats, staying up after dark, and some spooky thrills thrown in for good measure.
Of course, the true history of Halloween is rooted in pagan traditions meant to ward off ghosts. But there’s no denying there are plenty of things about our modern celebration that put it at the top of many kids’ list of favorite holidays.
That’s why I like to lean in on making Halloween especially fun. It’s a great way to have fun with your children and make some positive, lasting memories.
Get Crafty This Halloween with Easy DIY Ideas
Looking for simple, creative ways to make this Halloween extra special? Check out my Easy Halloween Crafts eBook! It’s packed with fun, low-cost ideas that are perfect for families.
Whether you’re planning a spooky party or just want to keep the kids entertained, these crafts will add a festive touch to your Halloween celebrations. Grab your copy here and get ready for some ghoulishly good fun!
❤️ Why You'll Love This Recipe
What could be more spooky than a snack filled with ghosts, bats, and other tasty treats? These Halloween Bat & Ghost Pretzels are the perfect recipe to keep your kids satisfied.
- Delicious flavor combination! Salty pretzels combined with sweet, creamy chocolate. Yum!
- They’re easy to make! Just four ingredients.
- They’re as much fun to make as they are to eat.
- Kids love them! It’s amazing how a pair of candy eyes can make a simple treat so much more appealing to kids.
If you love Halloween recipes like this one look no further than this Fall Party Mix recipe.
🥘 Ingredients for Chocolate Halloween Pretzels
You only need a few simple ingredients to help you make this Halloween treat recipe. After one quick trip to the grocery store to grab these ingredients, you will be ready to make this festive treat.
- Pretzels
- Black Candy Melts
- White Candy Melts
- 48 Candy Eyes
🔀 Substitutions
Almond Bark: If you don’t have candy melts you can use almond bark. It melts easily and comes in both white and dark chocolate.
Chocolate Chips: Instead of chocolate wafers, you can use dark and white chocolate chips instead. They will be thicker than melting chocolate though so be sure to add a little bit of vegetable or coconut oil (about 1 tablespoon for a 12 ounce bag).
Halloween Sprinkles: Of course, you don’t have to turn your pretzels into a bat, ghost or mummy to make them Halloween-themed. You can accomplish the same thing by covering them in Halloween sprinkles.
🌈 Variations / Options / Add-Ins
If you want to get really creative, you can add some other toppings to these pretzels. Some fun ideas include:
Oreo Crumbs: Sprinkle some Oreo crumbs over the pretzel bats to make them look furry.
Black Chocolate Sprinkles: These extra dark chocolate sprinkles also work great for giving the bats texture.
White Sparkling Sugar: Add some shimmer to your white ghost pretzels with white sparkling sugar.
If you’re looking for less spooky chocolate pretzels for Halloween, check out these pumpkin pretzels instead.
🥄 Equipment Needed / Helpful Tools
You only need a few kitchen tools to help you make these Halloween chocolate coated pretzels. Gather these tools and get ready to make this crispy treat.
- Baking sheet or cookie sheet
- Parchment paper or baking mat
- Small bowls
- Fork
🔪 How to Make Halloween Pretzels
Making these Halloween pretzels is simple. Just follow the easy instructions below and you will have a kid-friendly snack that is delicious, and perfect for class parties.
Step 1: Prepare a baking sheet
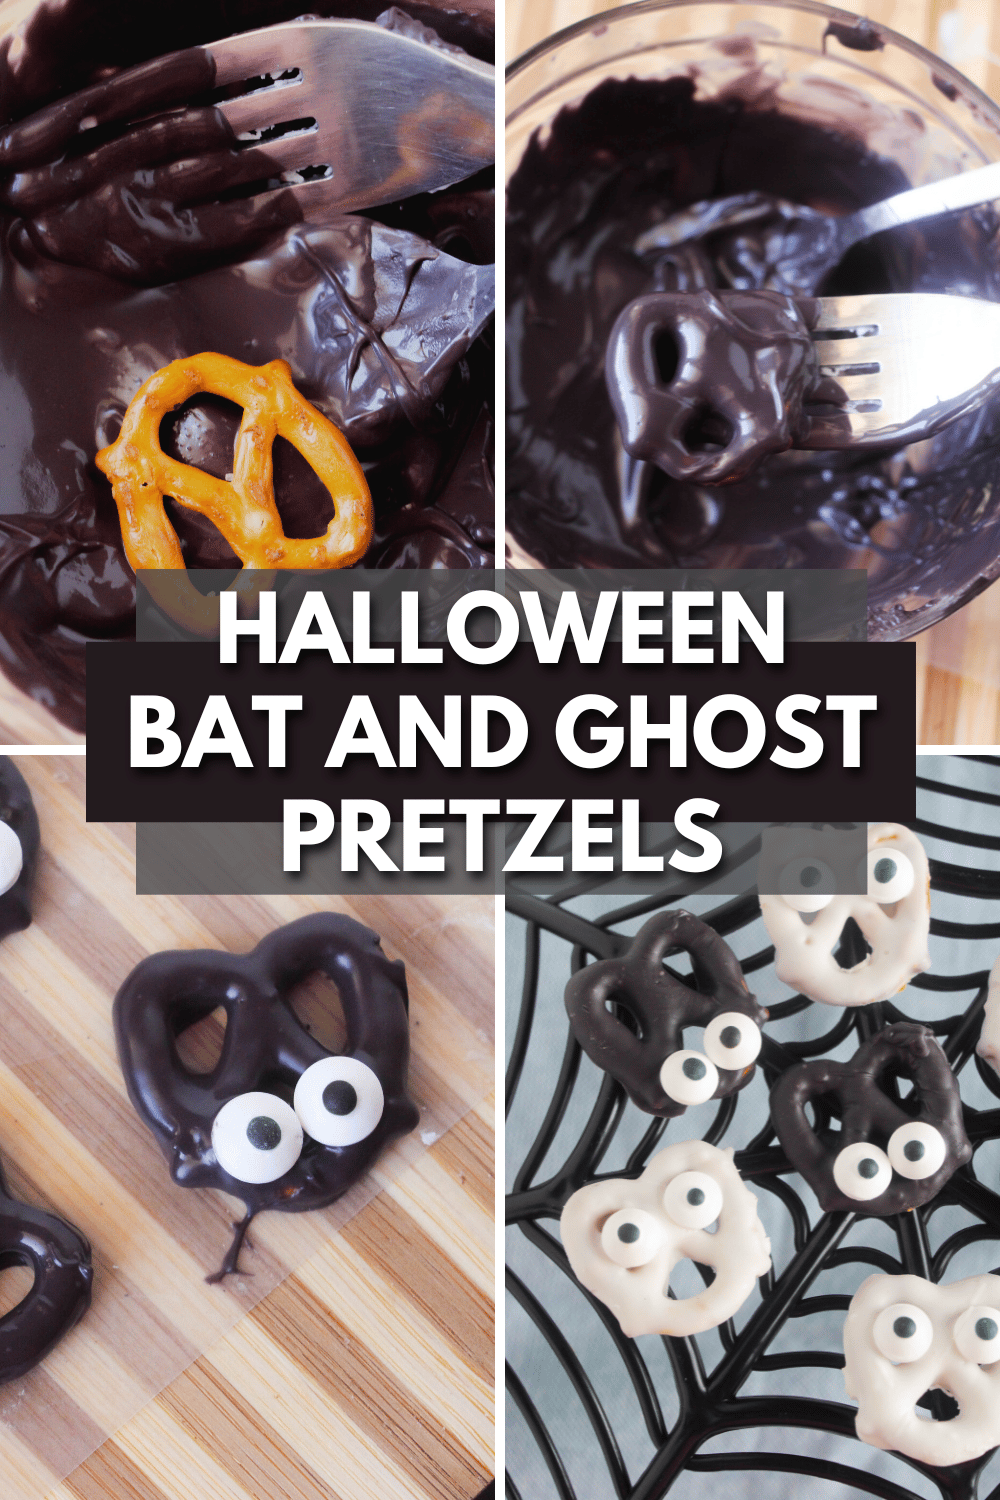
Cover a cutting board or cookie sheet with parchment paper or a silicone baking mat.
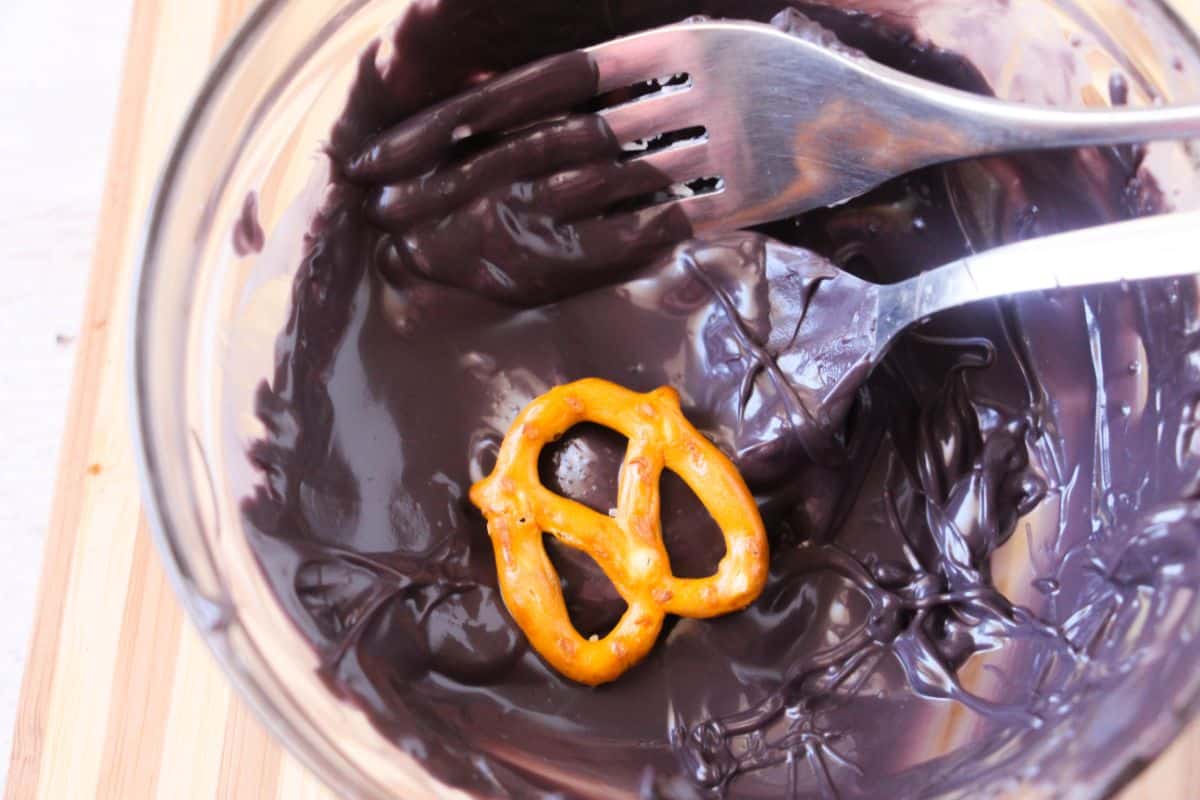
Step 2: Melt the chocolate
Place the colored chocolate or candy melts in a microwave-safe bowl (each color in a separate bowl) and heat for 20 seconds. Stir well and reheat as needed, until smooth and completely melted.
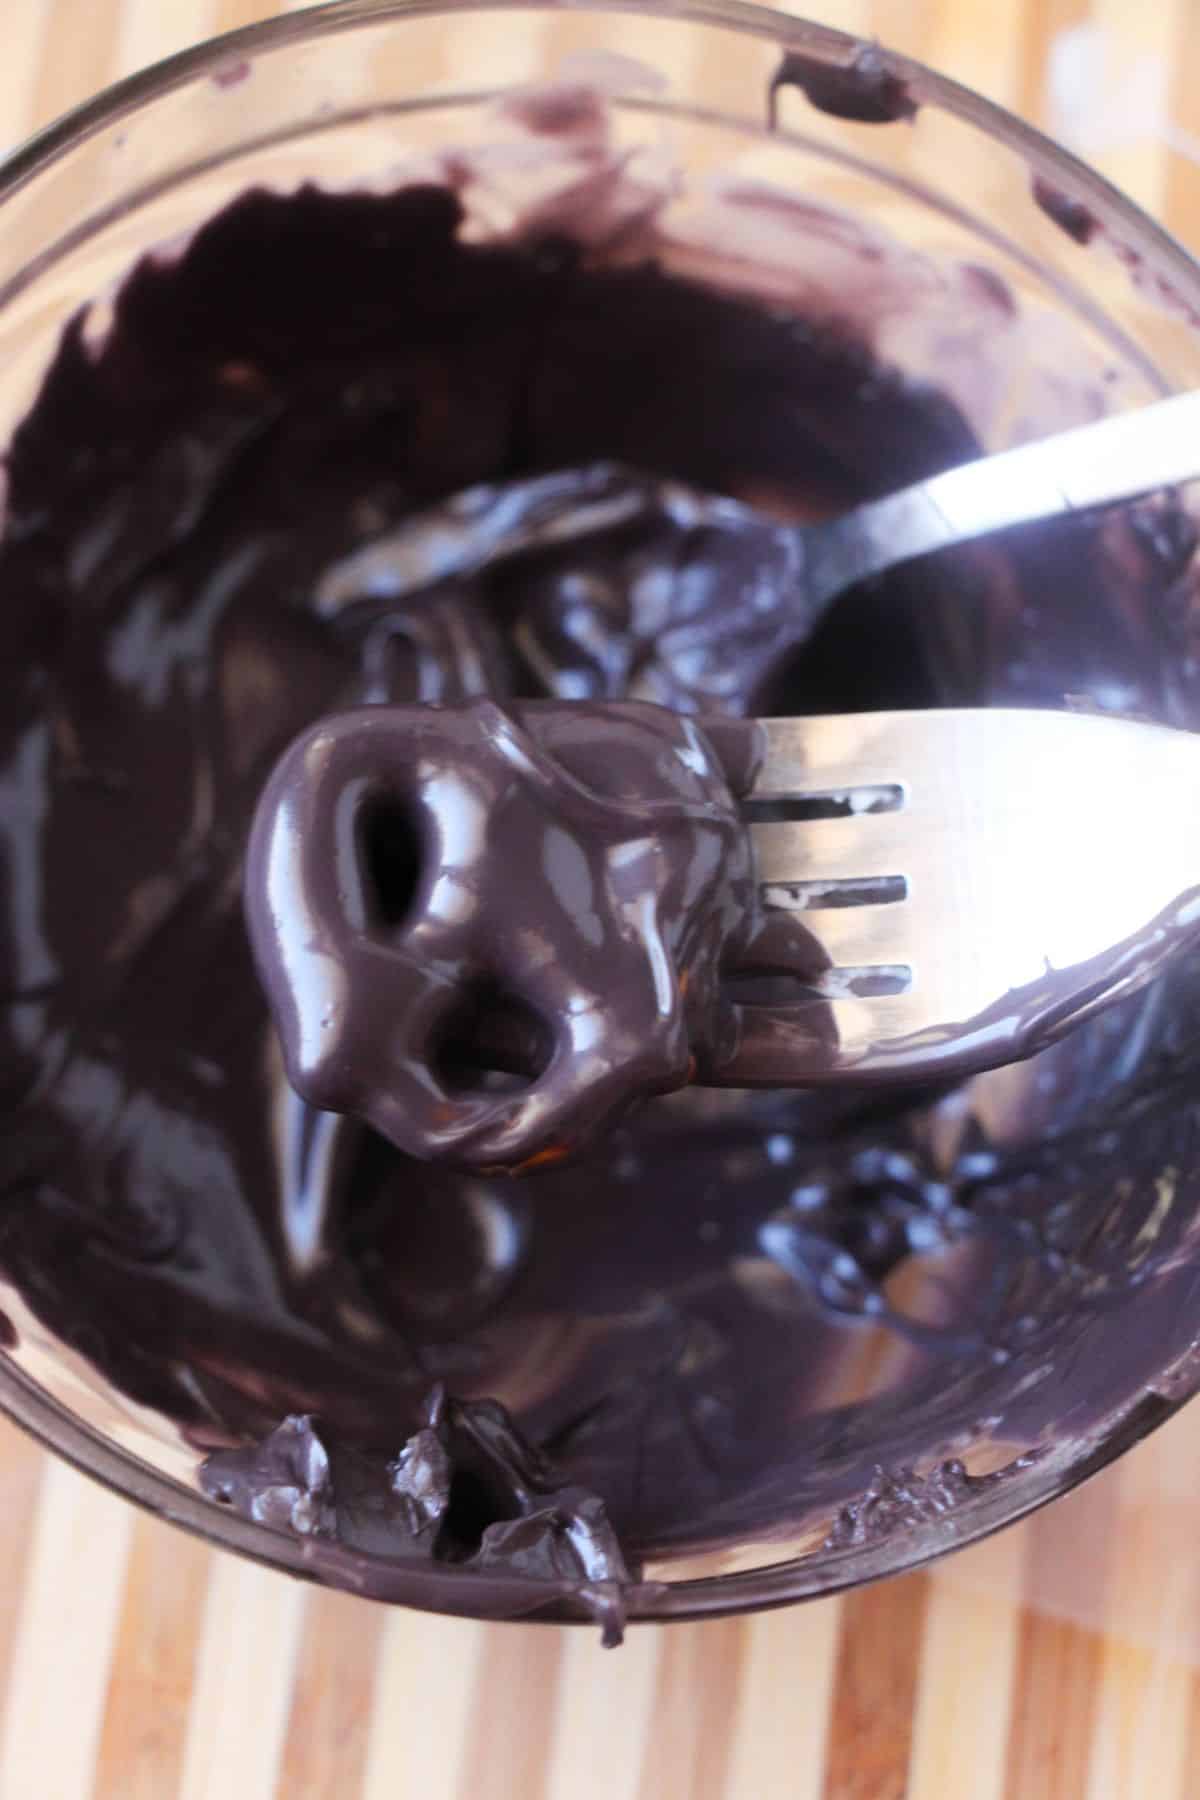
Step 3: Dip the pretzels
Use a spoon, fork or candy coating tool to individually dip each pretzel into the melted candy coating, making sure each pretzel is completely covered in chocolate.
Would you like to save this?
Step 4: Shake off the excess chocolate
Let the excess chocolate drip back into the bowl before placing the pretzel on the prepared cutting board. Repeat with all pretzels.
Set the pretzels on a piece of wax paper, making sure they don’t touch one another.
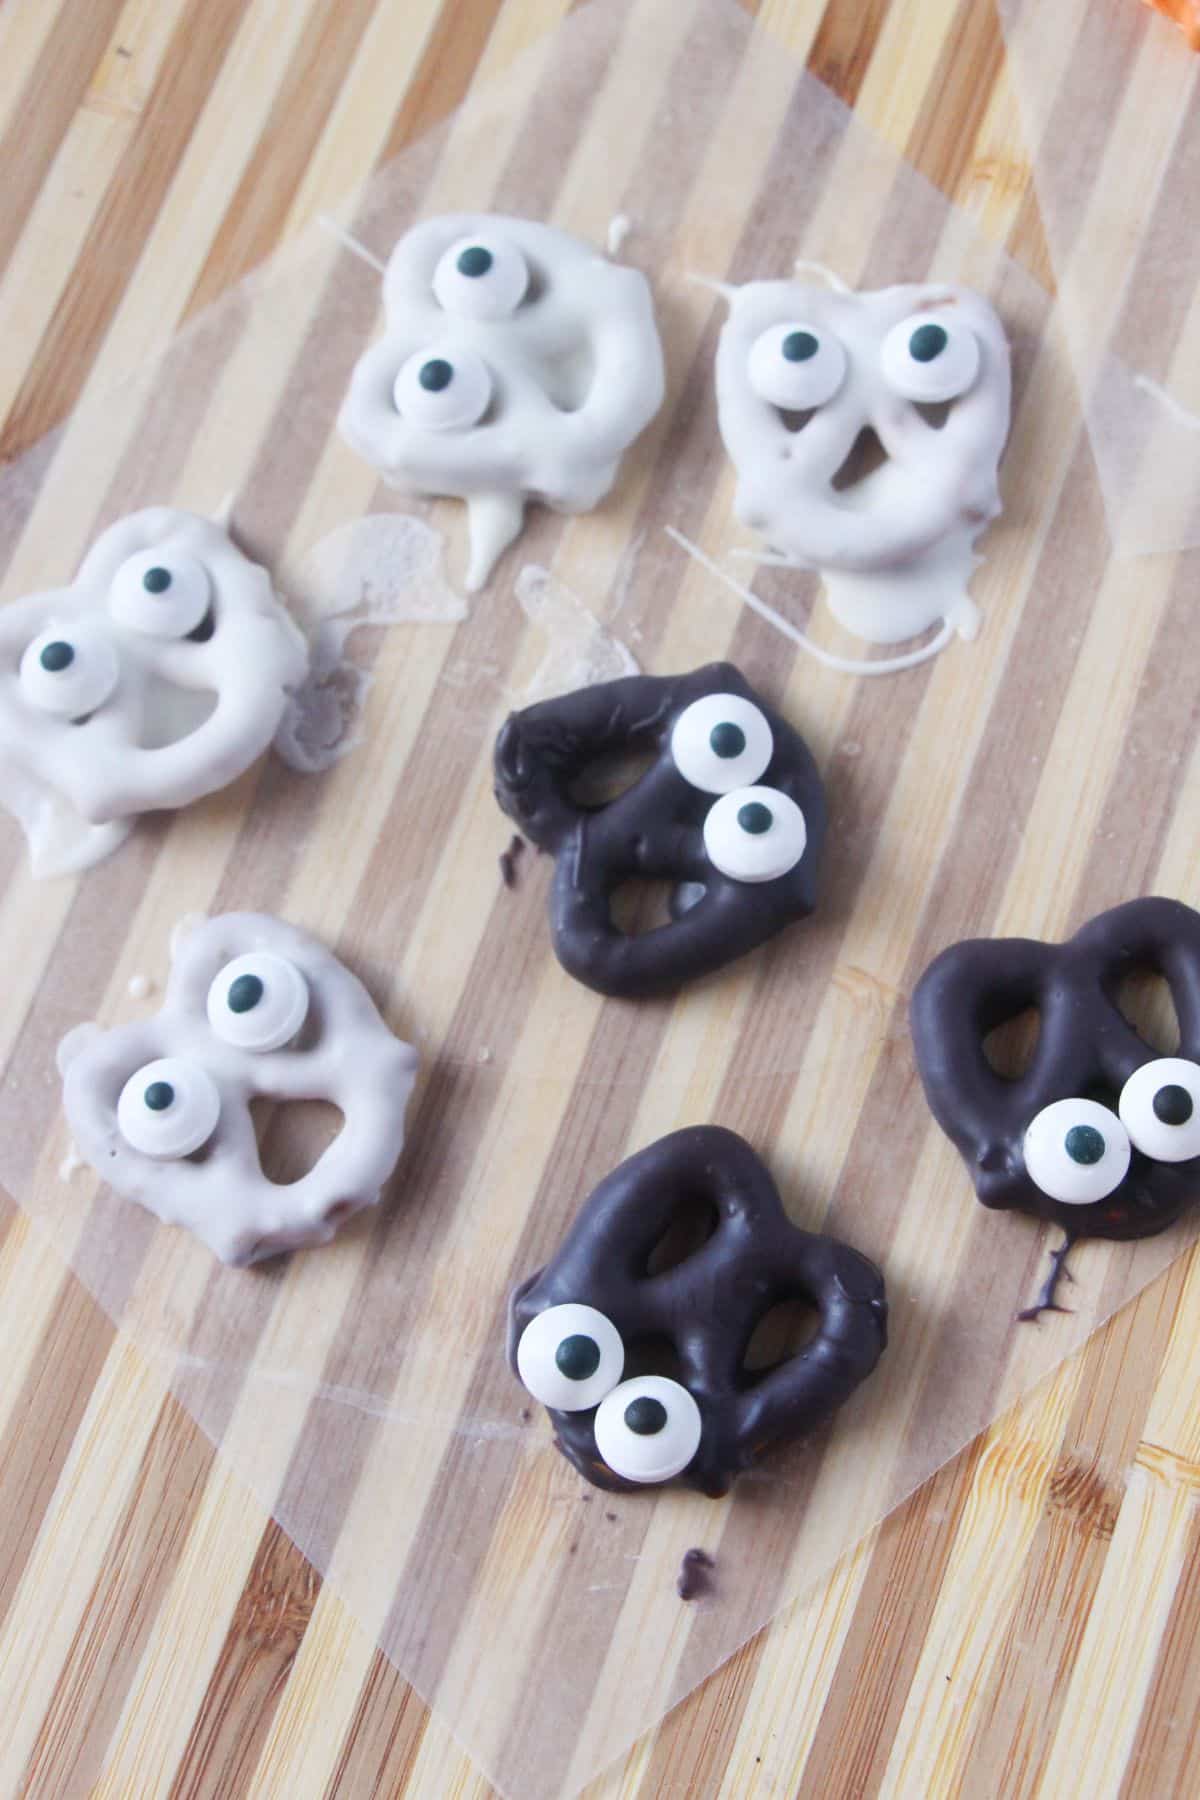
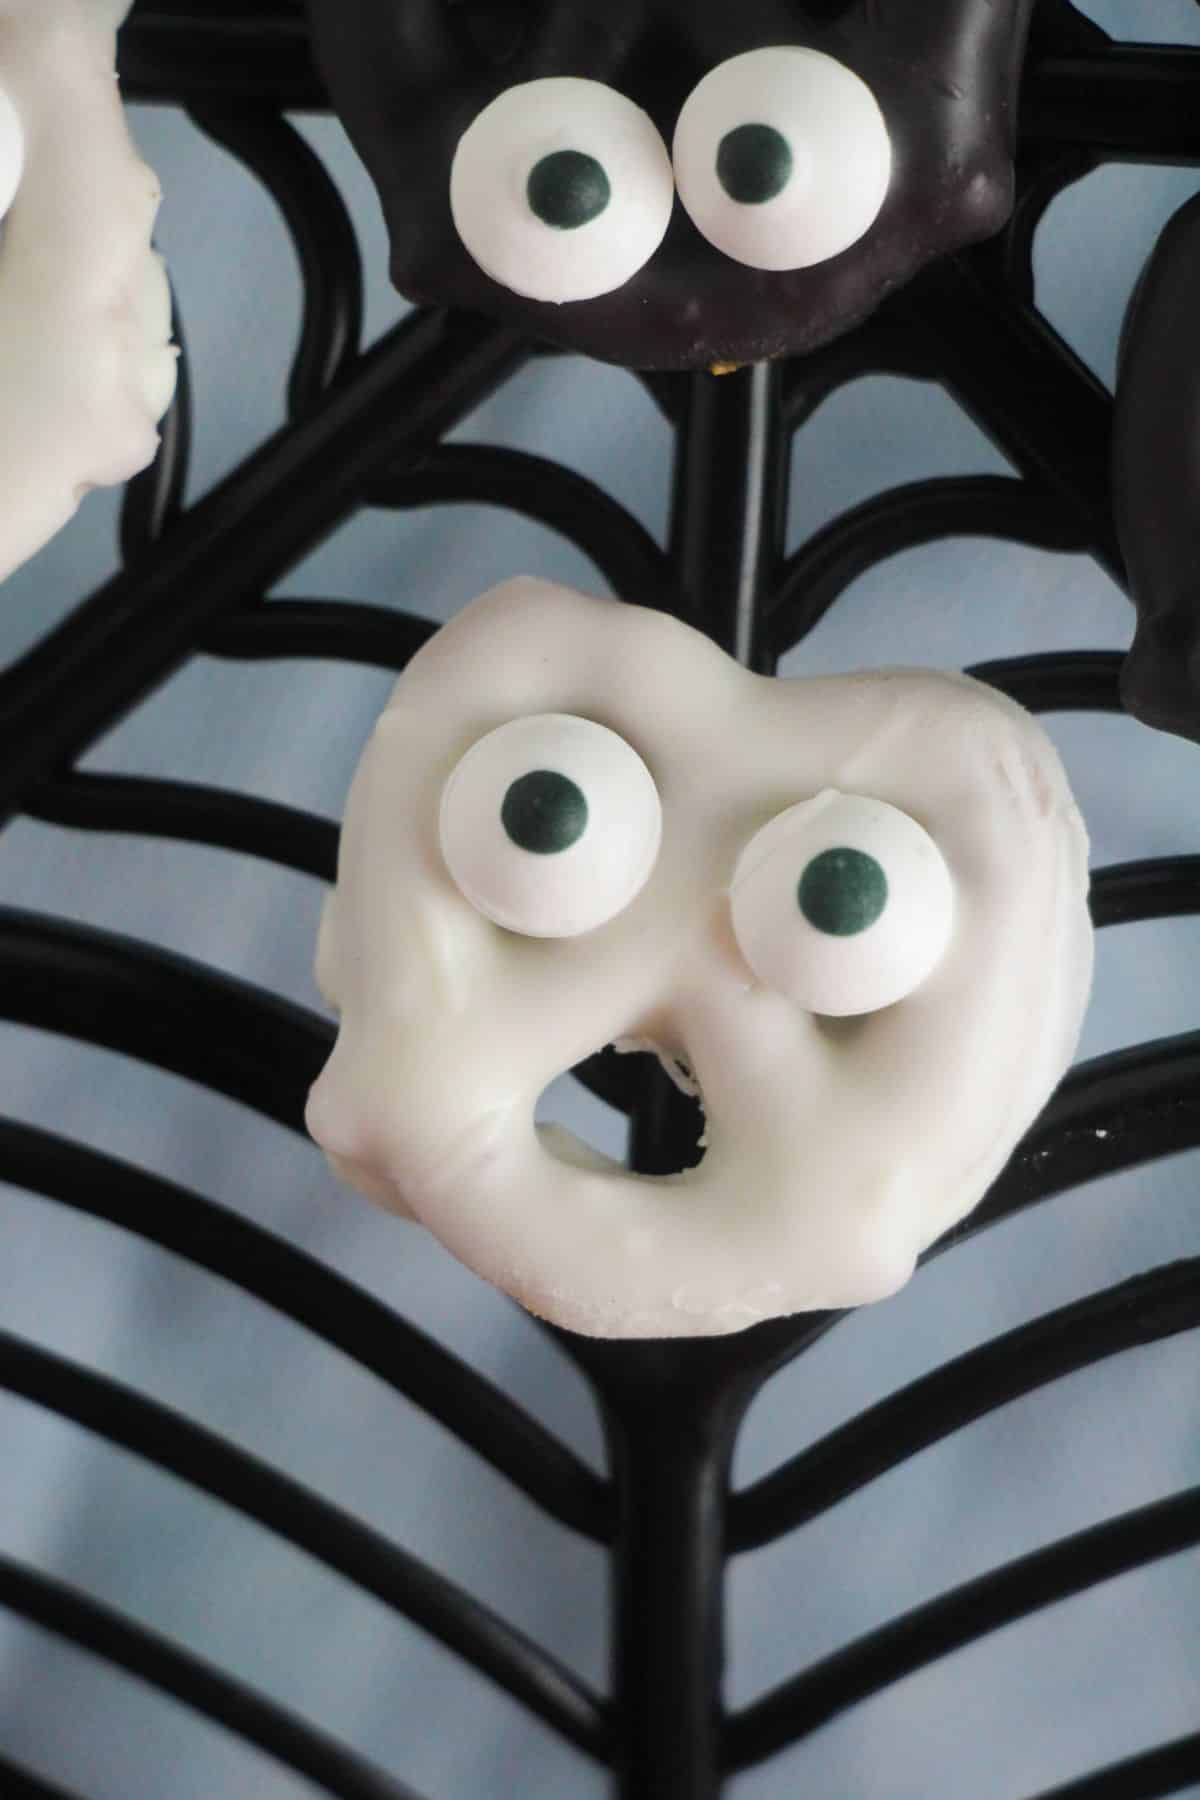
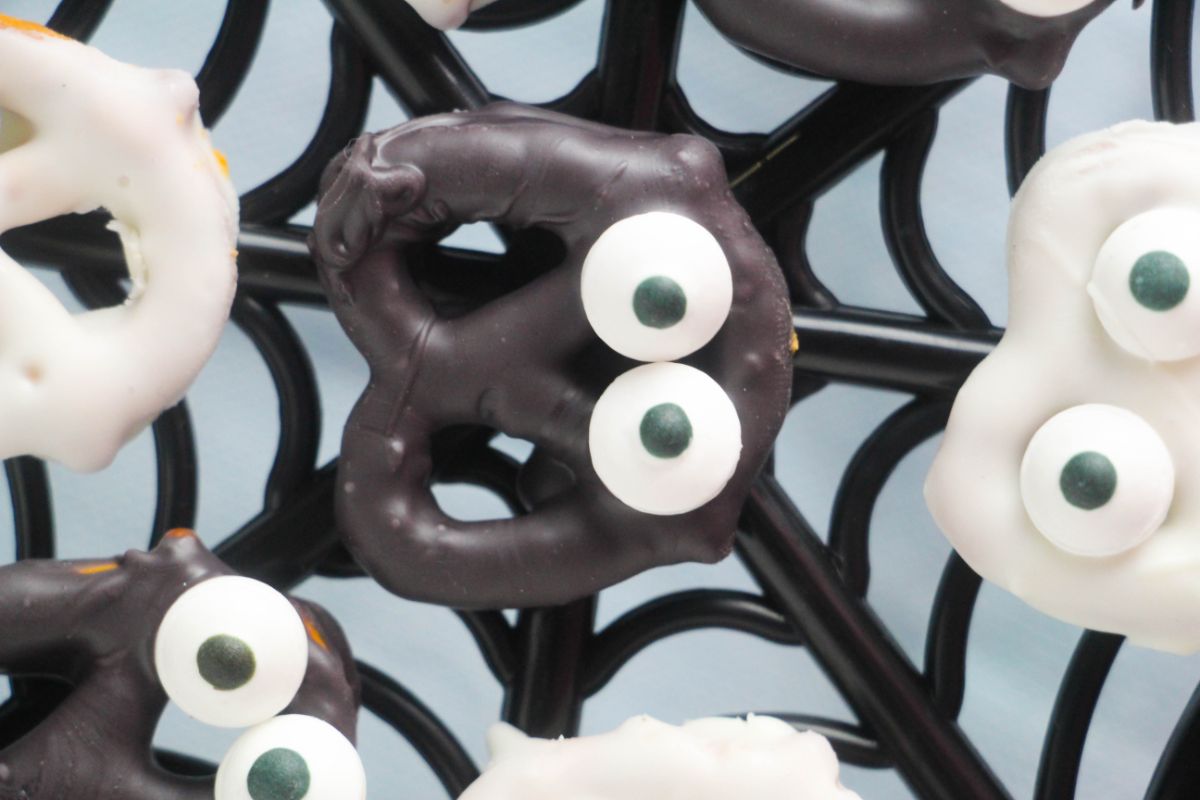
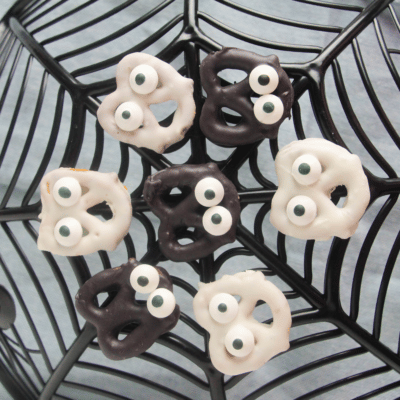
Step 5: Add the eyes
To make mummy or ghost pretzels, add candy eyes in the top two arches of the white chocolate dipped pretzels.
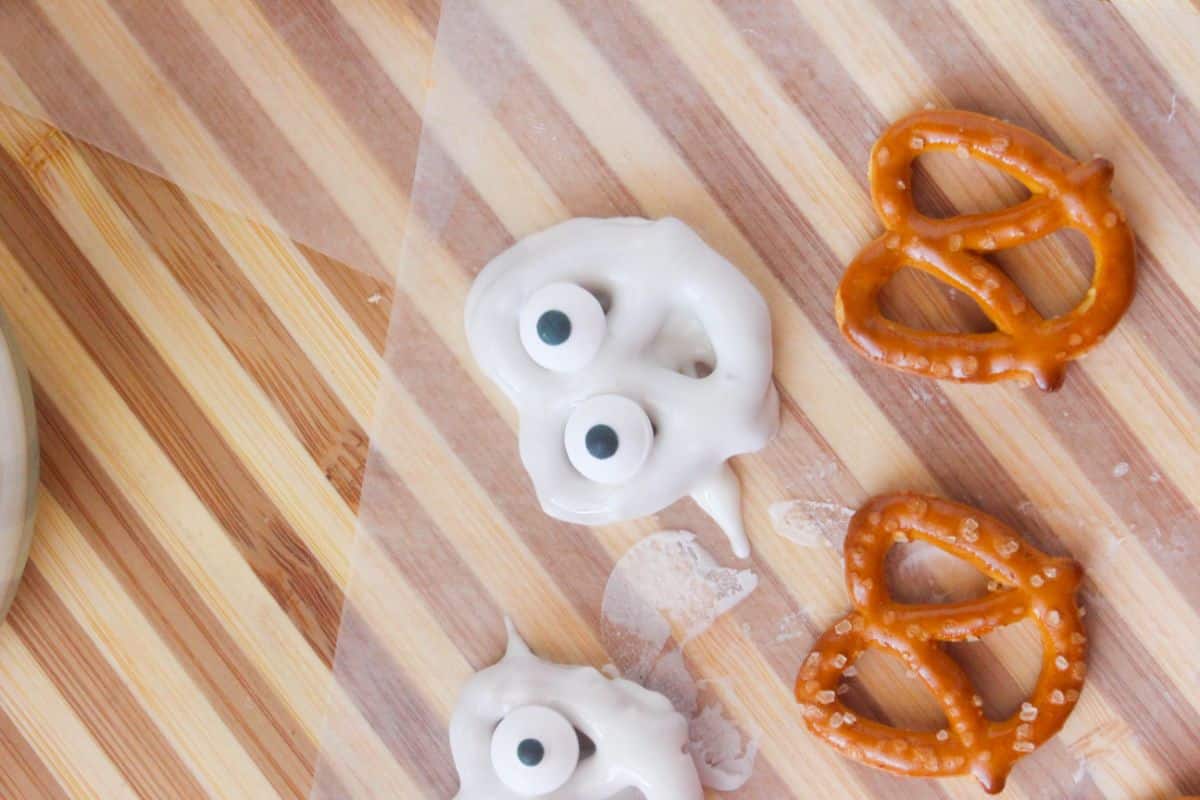
For the black candy-coated pretzels, place the two candy eyes at the base, rounded end, of the pretzel.
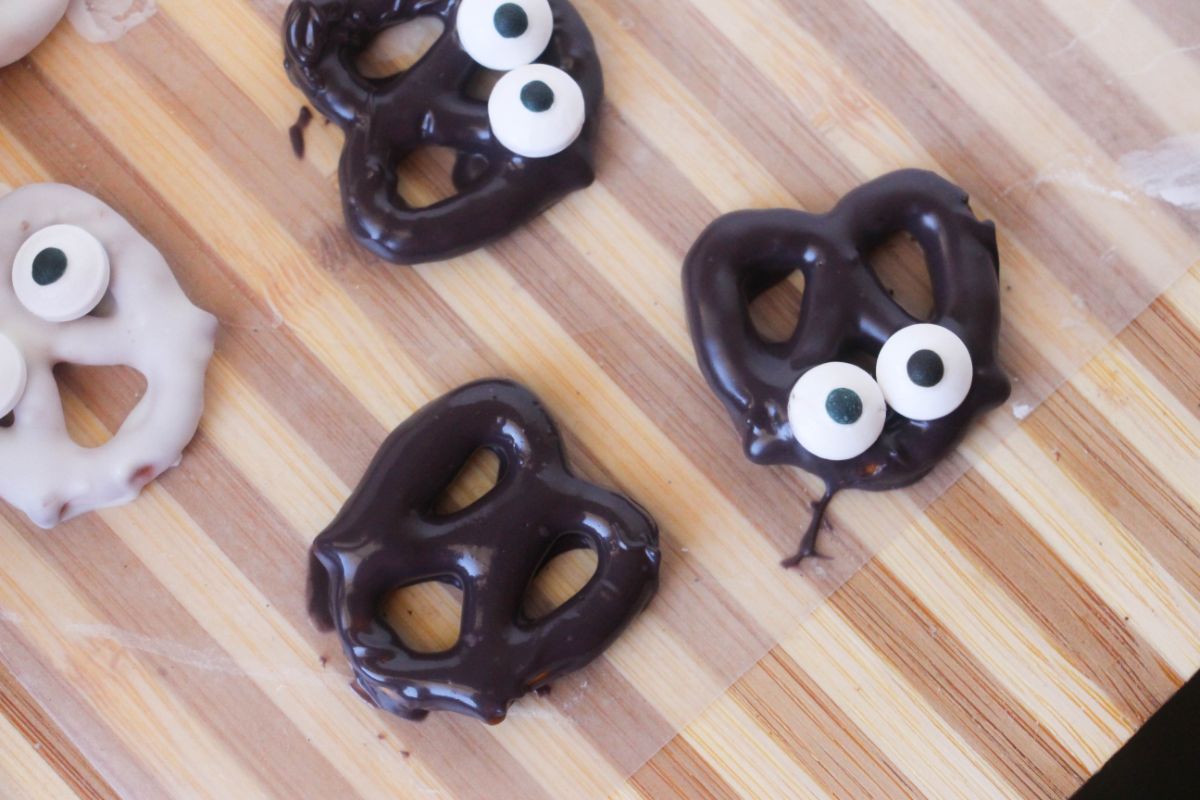
Step 6: Allow the chocolate to set
Let the dipped pretzels dry completely before serving or storing, about 30 minutes to one hour.
👩🍳 Pro Tips
Here are a few tips to help you make this Halloween snack recipe.
- If you want to make sure that your pretzels are coated evenly, try using a candy-coating tool. This will help you get an even coat of chocolate on each pretzel.
- Be sure to let the candy coating dry completely before serving or storing these pretzels. Otherwise, the candy coating may become sticky.
- Make sure that you keep these pretzels away from heat sources like the stove because they may melt.
- If you are adding sprinkles or other toppings to these bats and ghosts make sure to add them while the chocolate is still wet.
- If you find that your candy melts start to thicken while you are working with them, pop them back into the microwave for 30 seconds to warm them back up.
❓ Recipe FAQs
Do you have questions about this recipe? Here are the answers to the most commonly asked questions for this recipe.
These pretzels can be stored at room temperature in an airtight container for up to one week.
Yes, you can substitute the candy melts for white chocolate chips or milk chocolate chips.
Yes, you can freeze these pretzels for up to two months. Be sure to store them in an airtight container.
More Halloween Recipes
If you like Halloween recipes give these recipes a try:
Ready to get cooking? Print off the recipe card below or toggle on Cook Mode to keep your screen from going dark while you follow along on your phone or tablet.
📋 Recipe
📋 Recipe
Chocolate Covered Halloween Pretzels
Video
Would you like to save this?
Equipment
- baking sheet or cookie sheet
- parchment paper or baking mat
- small bowls
- fork or spoon
Ingredients
- 24 Pretzels
- ½ cup Black Candy Melts can use plain chocolate chips
- ½ cup White Candy Melts can use white chocolate chips
- 48 Candy Eyes
Instructions
- Cover a cutting board or cookie sheet with parchment paper or a silicone baking mat.
- Place the candy melts in a microwave-safe bowl and heat for 20 seconds. Stir well and reheat as needed, until smooth and completely melted.
- Use a fork or candy coating tool to individually dip each pretzel into the melted candy coating. Allow the excess candy coating to drip back into the bowl before placing the pretzel on the prepared cutting board. Repeat with all pretzels.
- For for the white candy-coated pretzels, place the candy eyes in the top two arches of the pretzels.
- For the black candy-coated pretzels, place the candy eyes at the base, rounded end, of the pretzel.
- Allow candy coating to dry completely before serving or storing, about 30 minutes to one hour.
Nutrition
Need to run to the store for a few ingredients first? Don’t forget to pin this recipe so you can find it when you’re ready to cook!