


Last Updated on December 18, 2024
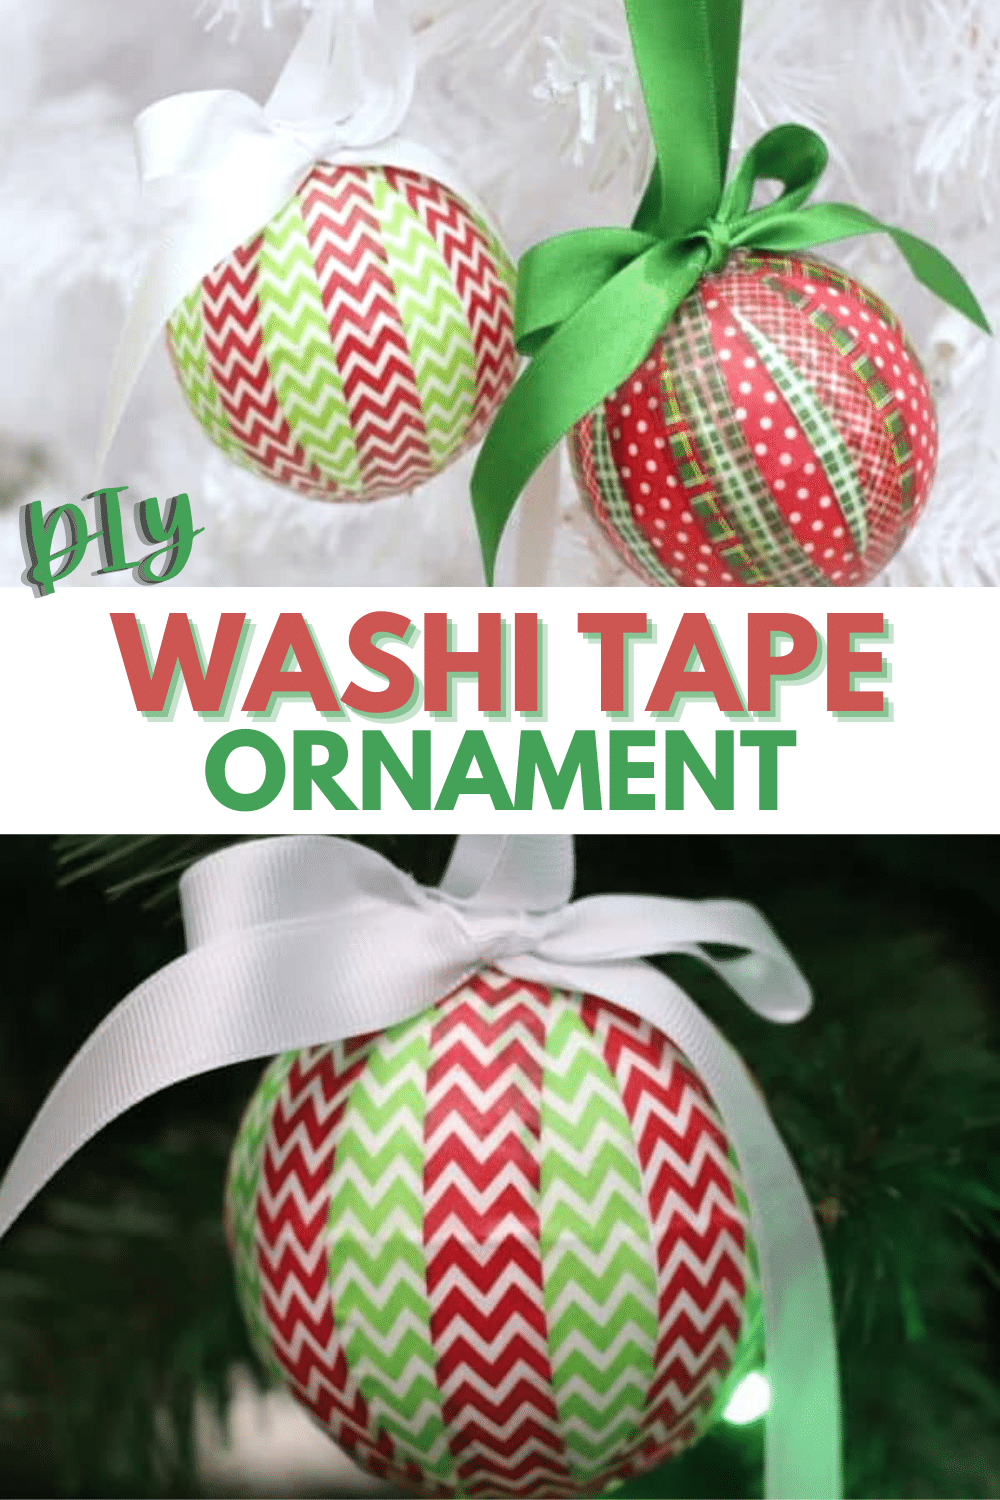
These DIY Washi Tape Ornaments are so colorful and easy to customize.

Like my Mason Jar Lid Fabric Ornaments, these are easy to customize by choosing washi tape in different colors and patterns. Now there’s no reason to resist that washi tape clearance bin when you’re at the craft store.
Homemade ornaments are a unique gift since your kids can help you make them in the colors, patterns, and designs that either you/they like best or the person that you’re making them for prefers. Each year when they’re hung on the tree, you’ll have the memory of making them with your kids or the person you made them for will think of your family.
You can also add the ornament as an embellishment to a gift - it adds a little something special to the wrapping.
Jump to:
Creative Ways to Customize Your Washi Tape Ornaments
- Layering: Overlap tapes with contrasting colors or patterns to create a textured look. You can also use varying widths of washi tape for a dynamic effect.
- Patchwork: Cut small pieces of washi tape and arrange them in a quilt-like patchwork design.
- Add Sparkle: Apply a layer of clear glue on the washi tape and then sprinkle on some glitter for an extra festive touch. Instead, you can use metallic or holographic washi tape for a shimmery finish.
- Add Mini Embellishments: Stick on small embellishments like beads, rhinestones, or pearls. Attach mini bows, bells, or pom-poms with hot glue to the ornament or string it on the hanging ribbon.
- Personalized Messages: Write names, dates, or short holiday messages using permanent markers on solid-color washi tape.
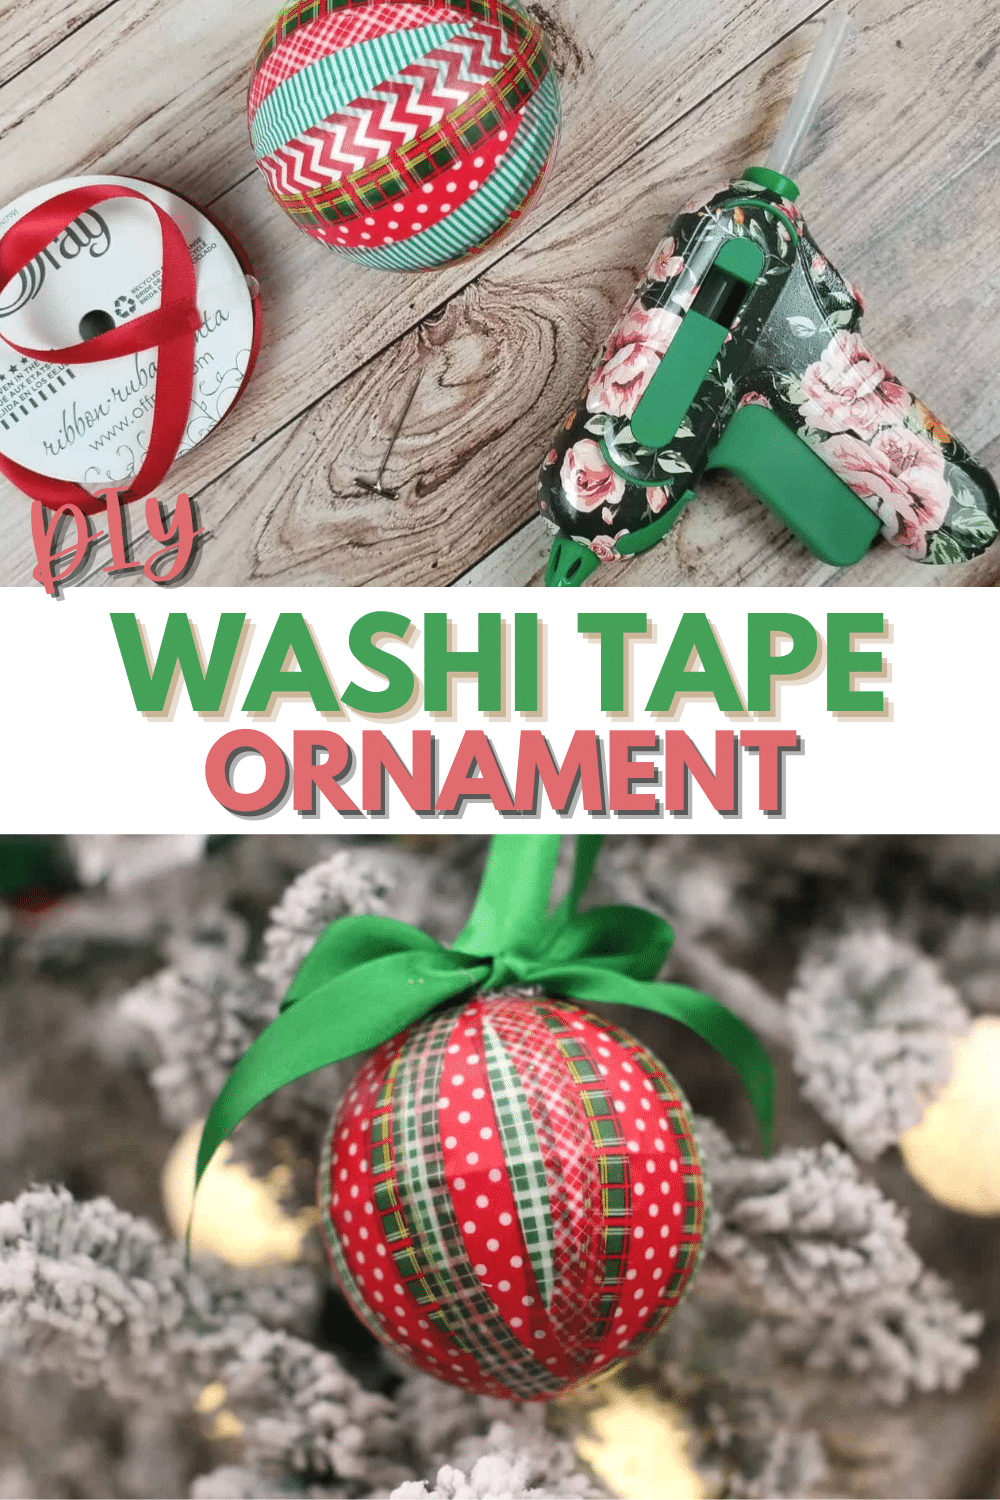
Materials Needed
You don't need very many supplies to make these ornaments and you probably already have most of them in your craft supplies. The amount you need of each supply depends on how many ornaments you’re going to make.

- Styrofoam ball(s): If you’re making a mini ornament for a small tree use a 2 – 3″ ball. For a regular size Christmas tree, use a 4 – 5″ ball.
- Washi tape: You can use any kind of washi tape that you want - it all depends on the theme of your ornament.
- T pins or floral pins: 1 – 1.5″ t pins would work for the small styrofoam ball and 2″ t pins would work for the regular size ball.
- Ribbon or twine: You'll attach this to the top of the ornament for hanging the ornament on the tree and also to make a bow.
- Glue Gun: When you add the bow to the top or if you decide to add any embellishments, use a hot glue gun to add them on.
How to Make a Washi Tape Ornament
This ornament is fast and easy to make. After you've gathered your supplies, you'll have an ornament made in just about 20 minutes (the time will vary based on how elaborate you make your design).
Step 1: Wrap the Ball with Washi Tape
First, grab a Styrofoam ball and some washi tape.
Stick one end of the washi tape to the ball, then wrap it around the perimeter until you’ve reached the spot where you began. Tear off the tape.

Keep doing this with new strips of tape until you’ve covered the entire ball.
Your kids can help you with this step - they can either follow the design you want or allow them to apply the tape however they want.
Step 2: Attach the ribbon
Then, plug in your glue gun and get the ribbon.

Cut a strip of ribbon to create a loop (this is how you’ll hang the ornament from the tree). Use a T-pin to attach the ribbon to the top of the ball.

Step 3: Make a bow
Then, cut another longer strip of ribbon and tie a bow. Use the glue gun to attach the bow to the top of the ornament and cover the T-pin that you placed in the previous step.
Would you like to save this?

Step 4: Hang or Gift the Ornament
The ornament is ready to hang on the tree if you and your kids made it for your own tree. You can also attach the ornaments to a wreath or arrange them on your mantel, shelves, or windowsills as standalone decorations or grouped with other festive items..
If you made it to give away you can attach it to a gift as a festive decoration, or this can be a gift from your kids to their teacher, family or friends. You can also give them away as party favors for holiday gatherings; each guest can take home a unique ornament to remember the event.

Ideas for Leftover Craft Supplies
Now that you're done making the ornaments, you might have some leftover craft supplies. So, if you're still in the crafting mood, here are some other things you can make using these same supplies.
Styrofoam Balls
You can use any leftover balls to make mini snowmen. Stack different-sized balls (small on top, larger on the bottom) and add buttons, a scarf, and a tiny hat for decoration.
If you want to make more ornaments, coat the balls in glue and roll them in glitter for sparkly ornaments. Hang them with a ribbon.
Make a centerpiece by grouping several balls together in a decorative bowl to mimic snowballs. Sprinkle fake snow or glitter for added effect.
Washi Tape
Use any leftover tape to decorate the bags used for this New Year countdown activity for kids. They’ll love opening the fun-looking bags to see what activity is inside.
If you’re going to participate in a 30 day water challenge for the New Year, you can use leftover washi tape to mark times and water levels on any water bottle that you have.
Let your kids make their own Christmas cards using leftover tape. They can also use the tape to decorate small place cards or tags for seating arrangements.
T Pins or Floral Pins
Use floral pins to attach any embellishments to to these DIY fabric mason jar lid ornaments or to secure ribbon loops on any other ornaments you make, ensuring they hang sturdily.
If you’re hosting a Christmas party, create a corkboard centerpiece where guests can pin (using t pins) holiday messages, wishes, or decorative items.
If you’re making the centerpiece mentioned above with the leftover styrofoam balls, use floral pins to attach decorative elements, like sequins or beads, to the balls for a glittery snowball effect.
Ribbon or Twine
You can use any leftover ribbon to make more bows to decorate the presents you wrap.
These cute snowman ornaments need a scarf made out of ribbon and if any of your ribbon is the kind that you can curl, it can be used to make these curled ribbon ornaments.
Remember the New Year countdown activity for kids mentioned as a use for any leftover washi tape? Well, you can use any leftover twine to tie up the bags.
Additional Christmas Fun
Keep the Christmas fun going strong for your family with some of these other fun printables, activities and treats.
- Christmas Would You Rather Questions - Excited to play a fun and insightful game this coming holiday? Check out our list of Christmas would you rather questions for all ages here!
- Countdown to Christmas Ideas - Awesome collection of countdown to Christmas ideas and advent calendar ideas! From fun for kids to beautiful decor, there's an idea for everyone.
- 30 Days of Family Christmas Activities - This 30 Days of Family Christmas Activities printable will help keep you on track to have the best holiday season making memories with your family.
- Christmas Dessert Lasagna - This Christmas Dessert Lasagna is made with delicious layers of red velvet brownies, and vanilla pudding, and topped with tangy peppermint.
- Peppermint Mocha Cupcakes - These Peppermint Mocha Cupcakes are a delightful holiday dessert! The cupcakes are moist and fluffy, with a rich chocolate flavor!
- Sugar Plum Hot Chocolate – Warm up this holiday season with Sugar Plum Hot Chocolate! This cozy, kid-friendly drink combines rich and fruity with a sweet twist, making it the perfect festive treat for all ages.

You do a great job with the washi tape. I tried doing a sytrofoam ball and I had several issues I was hoping you could help with. There were some puckers on the sides of the tape. Also it was see-through. I have never used this stuff before. Are there better quality or different quality brands? I made some with fabric strips cut on the bias with modgepod which really turned out great. Thanks for your help if you have time! Vicki
Ah yes, washi tape is pretty thin. If you don’t like the transparency of it on the styrofoam, you can either use plastic ornaments OR you can use the decorative duct tape. I haven’t found thin duct tape though so you’d have to cut strips to get the same effect, but it definitely wouldn’t be see through. Hope this helps!
Very easy instructions and I had everything to make a few! Thank You for fun projects! Gotta go look to see what else I can make. Maybe have an ornament get together thru video with other people. 🙂
J.M.
I’m glad you were able to make some ornaments. That’s a great idea to have an ornament get together on video!