


Last Updated on December 19, 2024
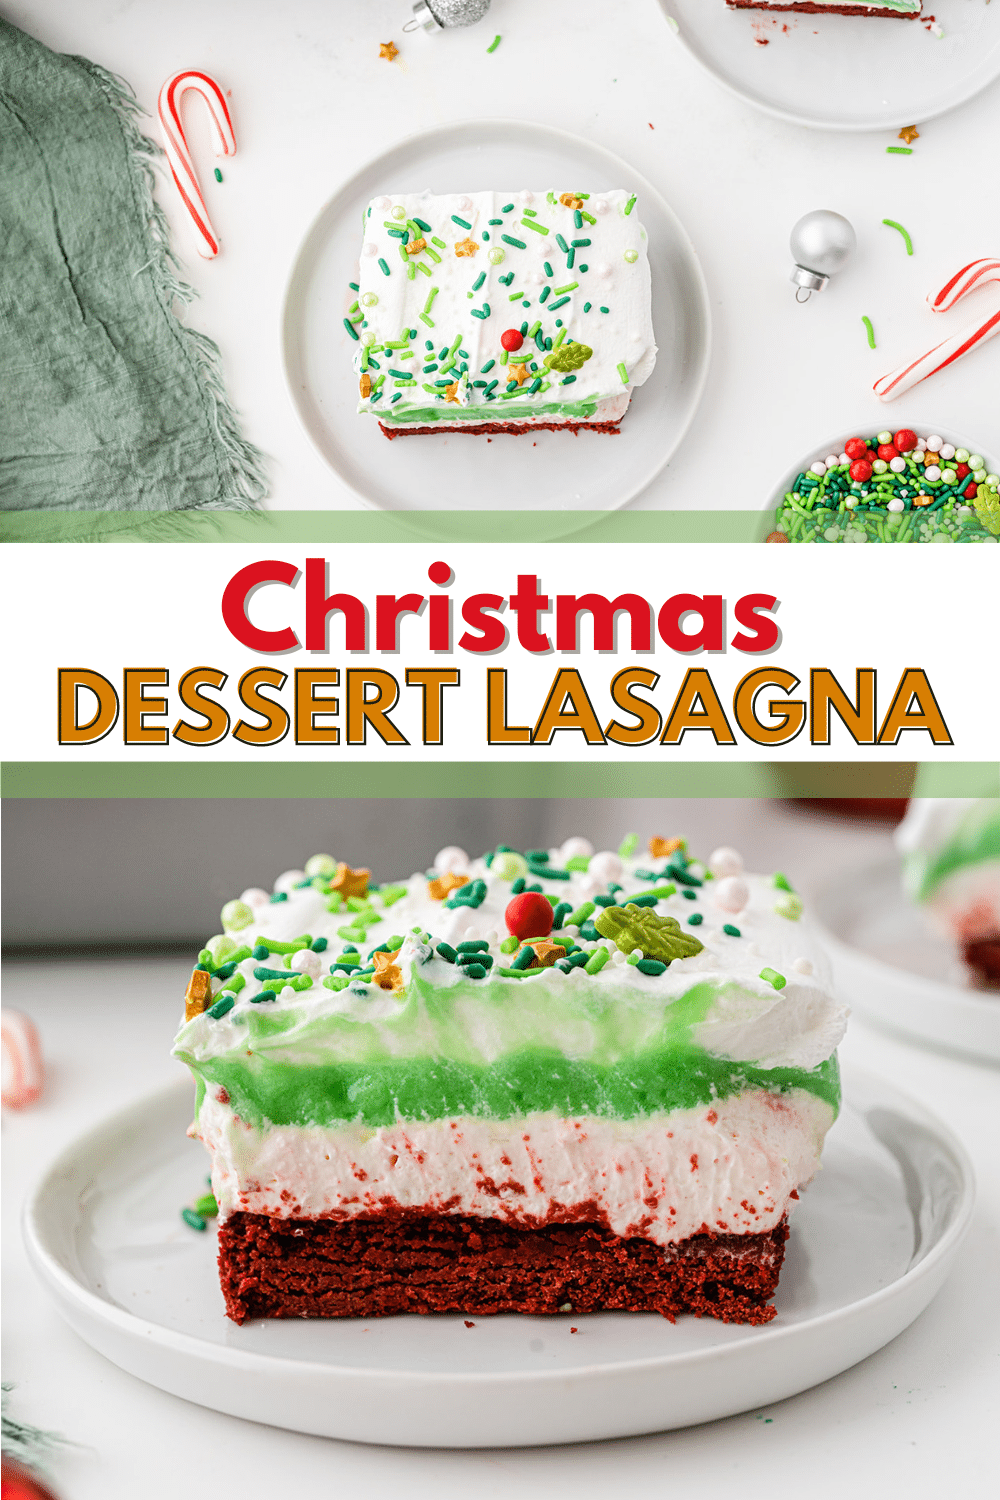
This Christmas Dessert Lasagna is made with delicious layers of red velvet brownies and vanilla pudding, topped with tangy peppermint.

The red velvet brownie base is fudgy, soft and chewy, while the vanilla pudding layer adds a creamy texture. It’s a colorful dessert, just like these Christmas pinwheel cookies, that will wow your friends and family.
While the cake is baking, you might want to sip on some Mexican hot chocolate and play a game of Christmas spot the difference with your kids.
Jump to:
- What are Some Fun Facts About Red Velvet Desserts?
- SAVE THIS RECIPE!
- ❤️ Why You'll Love This Recipe
- 🥘 Ingredients
- 🔀 Substitutions
- 🌈 Variations / Options / Add-Ins
- 🥄 Equipment Needed / Helpful Tools
- 🔪 How to Make Christmas Dessert Lasagna
- 👩🍳 Pro Tips
- ❓ Recipe FAQs
- 🙏 Pairing
- SAVE THIS RECIPE!
- 📋 Recipe
- Pro Tips
- Recipe FAQs
What are Some Fun Facts About Red Velvet Desserts?
While you and your kids are making this cake, it's a great time to talk. In case you need something to talk about, these fun facts about red velvet might be something your kids will enjoy learning about (they can show off what they learned later at Christmas dinner when they share these facts with your guests).
- While the exact origins of red velvet cake aren’t for sure, most agree that the red color of the cake likely first came from a chemical reaction between acidic ingredients like vinegar or buttermilk and raw cocoa powder.
- During World War II, when people had to ration their food supplies, bakers used beet juice to achieve the red color in red velvet cake. The beets made the cake pretty and soft.
- The cocoa powder that’s in stores now isn’t raw, so it doesn’t product the same chemical reaction. So, red food coloring or a natural alternative is used to give the cake it’s famous red coloring.
- Red velvet desserts taste sweet, tart and chocolaty. The cream cheese frosting provides the sweet flavor, the buttermilk is tart, and of course, the cocoa adds the chocolate flavor.
- The “velvet” part of the cake is due to its soft, smooth texture. In the 1800s during the Victorian Era, this velvet cake was served at fancy dinner parties and was considered a luxury.
- Red velvet cake is also known as “real Waldorf cake,” “Waldorf Astoria cake,” “red carpet cake,” “red mystery cake,” and “flame cake”.
SAVE THIS RECIPE!
Enter your email below and I’ll send it straight to your inbox.
❤️ Why You'll Love This Recipe
This Christmas Dessert Lasagna is made with four delicious layers for a colorful treat that will impress your friends or family members during the holidays.
- Easy to make: Even though this dessert looks like it’s hard to make, it really isn’t. Each layer is easy to prepare and your kids can help.
- Looks beautiful on a plate: With all of the colorful layers and the decorations on top, this cake is definitely very pretty.
- Always a hit at parties: Since it looks so nice, everyone will be excited to try the dessert.
If you love Christmas recipes like impress, then you may also enjoy these Minnie Mouse Reindeer Cupcakes.
🥘 Ingredients

You only need a few simple ingredients to make this easy dessert recipe. These ingredients are easy to find at your local grocery store, or you may already have some of them in your pantry.
- Red velvet cake mix: I like to use the Betty Crocker Red Velvet Cake Mix, however you can use any brand that you have on hand. This will be the first layer of the dessert.
- Cream cheese: You will need the block of cream cheese and not the whipped cream cheese.
- Confectioners sugar: In Canada, this is known as icing sugar. This plus the next three ingredients makes the second layer of the treat.
- Candy canes: Peppermint-flavored candy canes are best for this recipe to get the delicious peppermint flavor.
- Cool Whip: You don’t have to use the name brand - any brand of whipped topping will be fine.
- Vanilla instant pudding: Any brand is fine. Combine this with the food coloring for the third layer.
- Green food coloring: The gel food coloring gives the best color and doesn’t make your dessert runny.
See recipe card for complete list of ingredients and quantities.
🔀 Substitutions
If you don't have the ingredients you need, or if you have different dietary needs/preferences, see if you have these instead:
Cake mix: If you are not a fan of red velvet cake, you can use a vanilla or white cake mix, and add red food coloring to turn it red.
Cream cheese: For a lighter version with less fat, use Neufchâtel Cheese which still has the same creamy texture.
Sugar: Blend granulated sugar in a food processor to create a fine texture similar to powdered sugar. Use the same amount as you would the confectioners sugar.
Peppermints: If you don’t have candy canes on hand you can use crushed peppermints or starlight mints instead.
Cool whip: For a homemade version, whip 2 cups of heavy cream with 2 tablespoons of powdered sugar and 1 teaspoon of vanilla extract until soft peaks form.
Pudding: If you don’t have vanilla pudding, you can use white chocolate pudding or cheesecake-flavored pudding instead.
Food coloring: In case you don’t have the gel food coloring, you can use liquid food coloring, but add it slowly to avoid watering down the pudding. Another option is a pinch of matcha powder which creates a natural green hue while adding a mild earthy flavor.
🌈 Variations / Options / Add-Ins
Here are a few ways that you can personalize this delicious dessert recipe:
- Chocolate chips: Add more chocolate flavor to your brownie mix by folding in some chocolate chips to the batter.
- More peppermint: Add a teaspoon of peppermint extract to the cream cheese layer for extra minty flavor.
- Cheesecake swirl: Swirl some softened cream cheese into the red velvet cake batter before baking for a cheesecake brownie base.
- Fruit flavor: Add a layer of cherry pie filling between the cream cheese and pudding layers for a fruity burst.
If you like red velvet, but want to try a dessert that doesn’t have layers, try this Christmas poke cake instead.
🥄 Equipment Needed / Helpful Tools
You only need a few kitchen tools to help you make this delicious recipe.
- 9×13 baking dish: This is where the brownie layer will be cooked and also where you’ll assemble the rest of the recipe.
- Large bowls: You will need three large mixing bowls to make this recipe.
- Mixer: Use any kind of mixer you’re comfortable with.
- Spatula: You’ll use this to fold in the ingredients and to spread the layers.
🔪 How to Make Christmas Dessert Lasagna
Making this dessert lasagna is so simple. Just follow the instructions below and you will have a wonderful holiday dessert that your whole family will enjoy.
Step 1: Preheat Oven and Prepare Baking Dish
Preheat the oven to 350 F and grease a 13×9 pan.
Step 2: Mix the Batter
In a large bowl, mix cake mix, butter, and egg.
Would you like to save this?
Step 3: Put Batter in pan
Pour the batter into the prepared pan and spread it evenly with a spatula.
Step 4: Bake the Brownies
Place in oven for 15 minutes or until a toothpick inserted in the center comes out with a few moist crumbs on it.

Step 5: Cool the Brownies
Let the brownies cool for about an hour.
Step 6: Beat Cream Cheese
While the brownie layer is cooling, beat cream cheese and sugar together and add ¼ cup milk.

Step 7: Fold in Cool Whip and Candy Canes
Fold in one container of Cool Whip and the crushed candy canes.

Step 8: Spread Over Brownies
Spread the peppermint cheesecake layer evenly over the cooled brownie layer and place in the refrigerator for 15-20 minutes.

Step 9: Mix the Pudding
In a large bowl, whisk the milk and the instant pudding mix together. Add the green gel coloring a few drops at a time until you’re happy with the shade.

Step 10: Add Pudding Layer and Chill
Pour the green pudding layer over the cream cheese layer and place it back into the refrigerator to set up for at least 4 hours.

Step 11: Top with Cool Whip and Serve
When ready to serve, top with the second container of Cool Whip and the sprinkles for the final layer. Serve immediately.


👩🍳 Pro Tips
Here are a few tips to make sure that your Christmas Lasagna turns out perfectly every time that you make it.
- Don’t overbake the brownie layer - a few moist crumbs on the toothpick are perfect; avoid waiting for it to come out clean.
- Let the brownie layer cool completely before adding the cream cheese layer. A warm base will cause the layers to mix and lose their distinct appearance.
- Beat the cream cheese and powdered sugar well to avoid lumps. If you see lumps, beat for another minute or two until the mixture is completely smooth before folding in the Cool Whip.
- Fold, don't mix, the Cool Whip into the cream cheese layer to preserve its light and airy texture.
- Let the pudding mixture sit for 2-3 minutes to thicken before spreading it over the cream cheese layer.
- For a decorative finish, use a piping bag to pipe the whipped topping on top. Add swirls or stars for a fancier look.
- For clean slices, use a sharp knife and wipe it carefully with a damp paper towel between cuts. This keeps the layers distinct and neat.
❓ Recipe FAQs
Yes, this dessert is perfect for making ahead. In fact, it's better if it’s made the night before because it gives the layers time to set and the flavors to meld.
Just leave off the final layer of Cool Whip and toppings until right before serving to keep it fresh and visually appealing.
Place the candy canes in a zip-top bag, seal it, and use a rolling pin to crush them into small pieces.
Cover the pan tightly with plastic wrap or foil and store in the refrigerator for up to 3-4 days. For the best texture, consume it within 2 days.
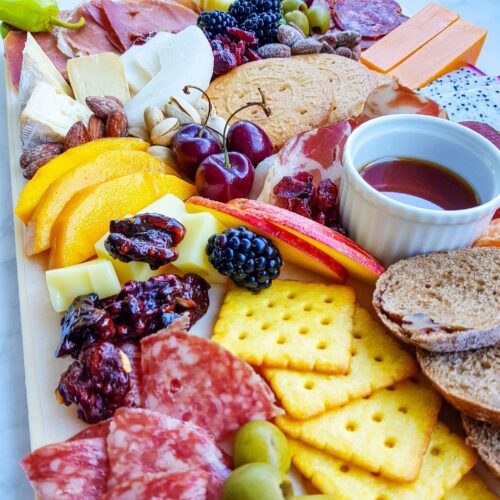
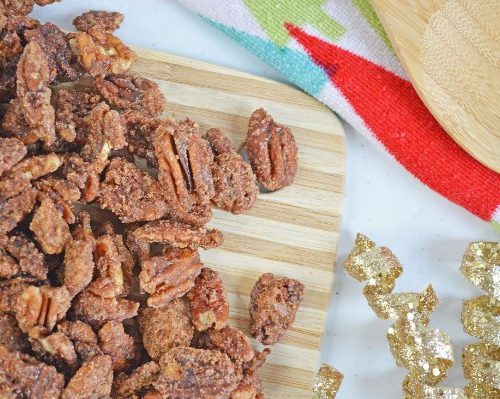
🙏 Pairing
These are my favorite dishes to serve with Christmas Dessert Lasagna:


Ready to get cooking? Print off the recipe card below or toggle on Cook Mode to keep your screen from going dark while you follow along on your phone or tablet.
SAVE THIS RECIPE!
Enter your email below and I’ll send it straight to your inbox.
📋 Recipe

Christmas Dessert Lasagna
Video
Would you like to save this?
Equipment
- 9×13 baking dish
- large bowls
- Mixer
Ingredients
- 15.25 ounces Red Velvet cake mix
- ½ cup butter melted
- 1 egg
- 16 ounces cream cheese
- ½ cup confectioners sugar
- ¼ cup crushed candy canes
- 2 ¾ cups milk divided
- 16 ounces Cool Whip
- 6.8 ounces vanilla instant pudding
- green gel food coloring
- Christmas themed sprinkles and crushed candy canes for topping
Instructions
- Preheat the oven to 350 F and grease a 9×13 pan.
- In a large bowl, mix cake mix, butter and egg.15.25 ounces Red Velvet cake mix, ½ cup butter, 1 egg
- Pour the batter into the prepared pan and spread it evenly with a spatula.
- Place in oven for 15 minutes or until a toothpick inserted in the center comes out with a few moist crumbs on it.
- Let the brownies cool for about an hour.
- While the brownie layer is cooling, beat cream cheese and sugar together and add ¼ cup milk.16 ounces cream cheese, ½ cup confectioners sugar
- Fold in one container of Cool Whip and the crushed candy canes.¼ cup crushed candy canes, 16 ounces Cool Whip
- Spread the peppermint cheesecake layer evenly over the cooled brownie layer and place in the refrigerator for 15-20 minutes.
- In a large bowl, whisk the milk and the pudding mix together. Add the green gel coloring a few drops at a time until you're happy with the shade.2 ¾ cups milk, 6.8 ounces vanilla instant pudding, green gel food coloring
- Pour the pudding over the cream cheese layer and place back into the refrigerator to set up for at least 4 hours.
- When ready to serve, top with the second container of Cool Whip and the sprinkles. Serve immediately.Christmas themed sprinkles and crushed candy canes for topping
Notes
Pro Tips
- Don't overbake the brownie layer - a few moist crumbs on the toothpick are perfect; avoid waiting for it to come out clean.
- Let the brownie layer cool completely before adding the cream cheese layer. A warm base will cause the layers to mix and lose their distinct appearance.
- Beat the cream cheese and powdered sugar well to avoid lumps. If you see lumps, beat for another minute or two until the mixture is completely smooth before folding in the Cool Whip.
- Fold, don't mix, the Cool Whip into the cream cheese layer to preserve its light and airy texture.
- Let the pudding mixture sit for 2-3 minutes to thicken before spreading it over the cream cheese layer.
- For a decorative finish, use a piping bag to pipe the whipped topping on top. Add swirls or stars for a fancier look.
- For clean slices, use a sharp knife and wipe it carefully with a damp paper towel between cuts. This keeps the layers distinct and neat.