


Last Updated on March 14, 2025
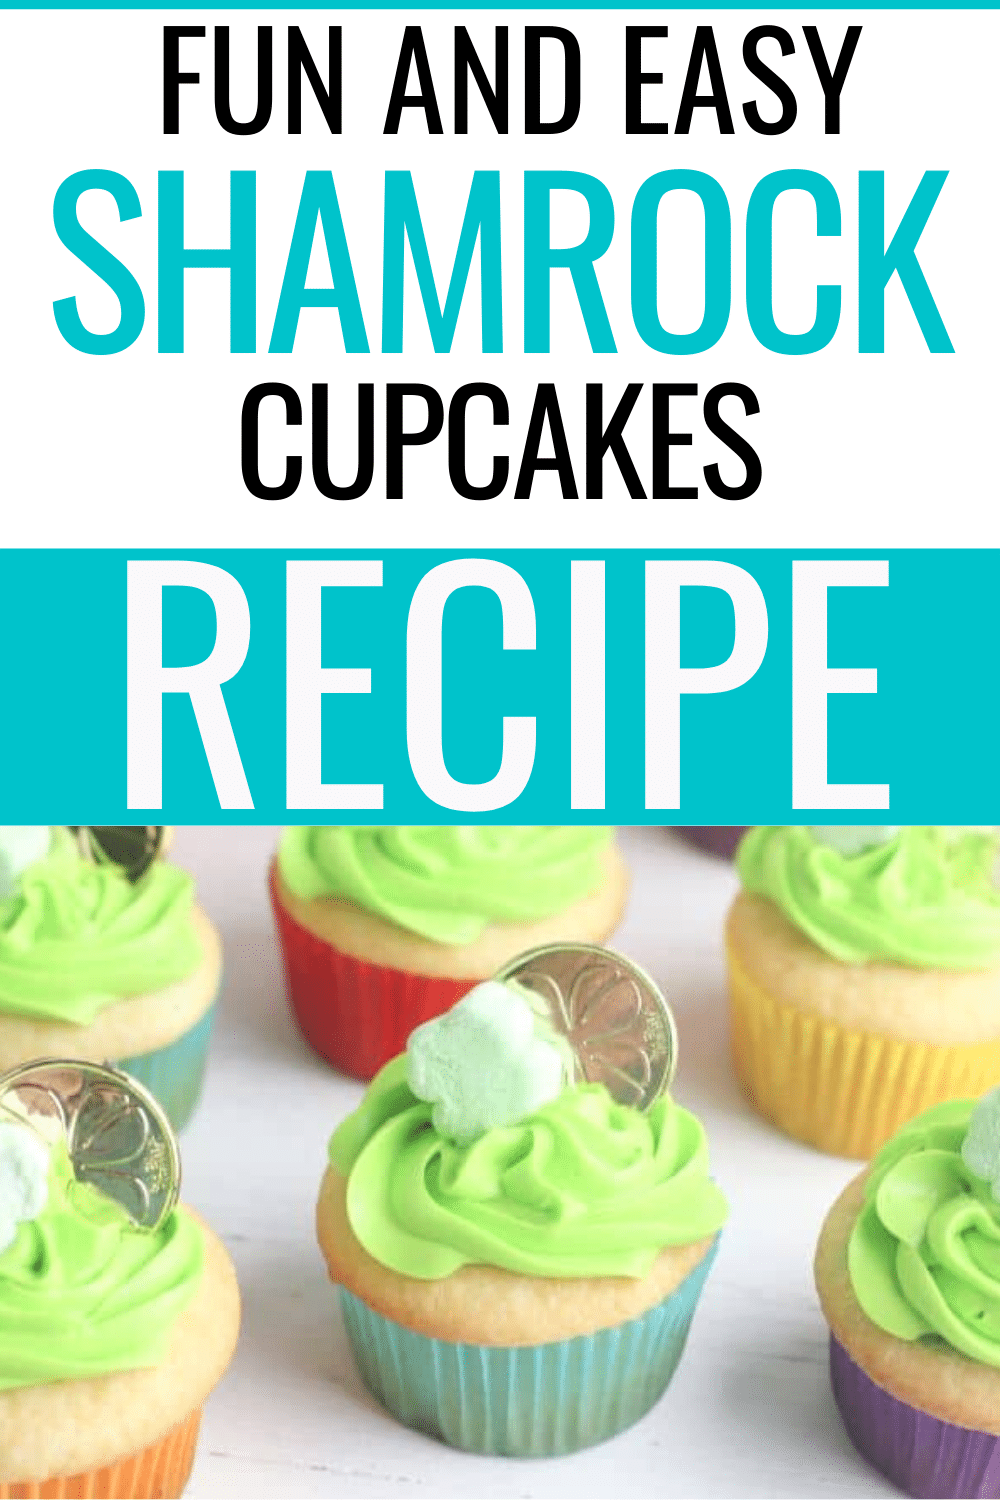
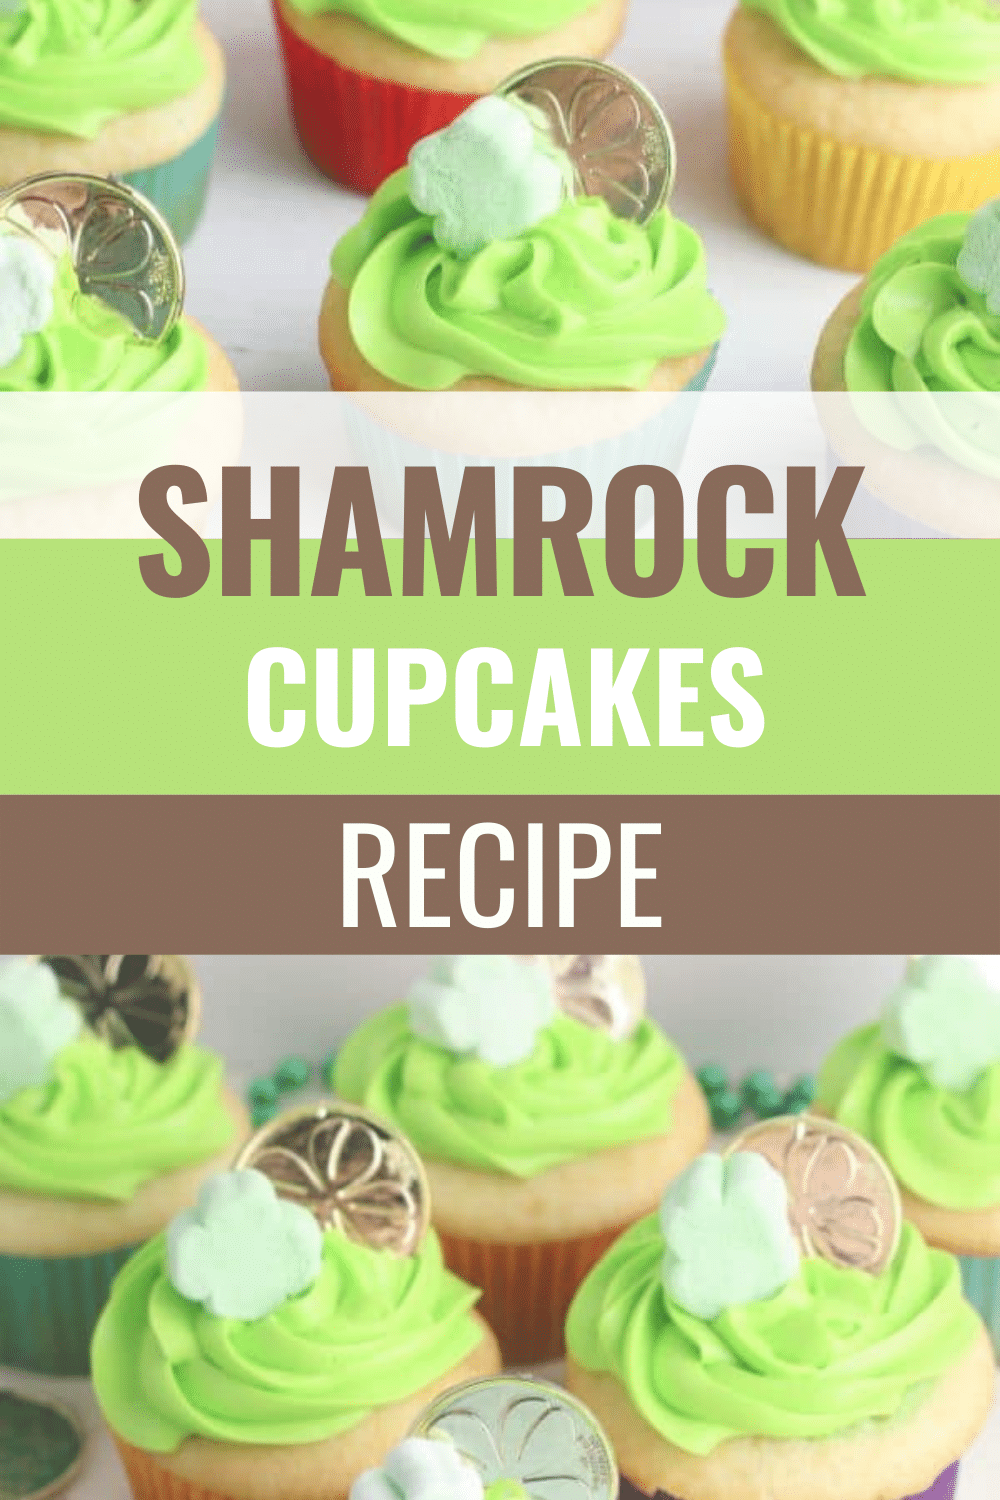
These Easy Shamrock Cupcakes are sure to satisfy even the most mischievous of leprechauns (which is probably what your children are pretending to be this time of year).

Anyone who gets to enjoy one will certainly feel lucky!
You don’t have to be Irish to enjoy a little St. Patrick’s Day fun. Break out your favorite green shirt or accessories (St. Patrick’s Day is the perfect time to pull those emerald earrings out of the jewelry box). Then whip up some fun treats for your friends and family.
Just a simple white cupcake topped with green frosting, a shamrock marshmallow, and a toy gold coin. So easy, just like these green velvet cupcakes.
Jump to:
- What are Some Fun Facts About Lucky Charms Cereal?
- SAVE THIS RECIPE!
- ❤️ Why You’ll Love This Recipe
- 🥘 Ingredients
- 🔀 Substitutions
- 🌈Variations / Options / Add-Ins
- 🥄 Equipment Needed / Helpful Tools
- Tired of Ads?
- 🔪 How to Make These Easy Shamrock Cupcakes
- 👩🍳 Pro Tips
- ❓ Recipe FAQs
- 🙏 Pairing
- SAVE THIS RECIPE!
- 📋 Recipe
- Pro Tips
- Recipe FAQs
What are Some Fun Facts About Lucky Charms Cereal?
While you and your kids are making these cupcakes, it's a great time to talk. In case you need something to talk about, these fun facts about Lucky Charms cereal might be something your kids will enjoy learning about (they can show off what they learned at school when they share these facts with their teacher and classmates).
- The first Lucky Charms cereal was made in 1964. The oat cereal pieces were shaped like bells, fish, arrowheads, clovers, and x-shapes and the marshmallows were shaped like green clovers, pink hearts, orange stars, and yellow moons.
- The cereal was created by John Holahan, who experimented with Cheerios and chopped up pieces of Circus Peanuts to come up with the idea for Lucky Charms cereal.
- Lucky the Leprechaun made his debut on St. Patrick’s day in 1964 and was originally called L.C. Leprechaun. He was featured in full-color print ads in the comics in the Sunday paper and was also in comic books and animated television ads.
- The cereal’s name came from an idea suggested by an advertising company that the cereal should be marketed around the idea of charm bracelets.
- There have been over 40 different marshmallow bits over the years, and the only original one that still remains is the pink heart.
SAVE THIS RECIPE!
Enter your email below and I’ll send it straight to your inbox.
❤️ Why You’ll Love This Recipe
These delicious Shamrock Cupcakes are a fun treat to serve your kids this holiday.
- Easy to make: Since you use a box mix to make the cupcakes, they’re super easy to put together.
- Fun to make: Since your kids can help you make these, you can have fun making memories by playing some St. Patrick's Day songs for kids and having a dance party as you wait for the cupcakes to bake.
- Always a hit at parties: Since everyone’s looking for some luck to come their way, they’ll enjoy these fun cupcakes that come with a lucky shamrock and gold coin.
For some additional lucky treats, try these Lucky Charms cupcakes.
🥘 Ingredients
There are only 4 ingredients in this easy cupcake recipe.
- White cake mix: This is for making the cupcakes. Any brand you want to use is fine.
- Shamrock marshmallows: You can get these from a bag of Lucky Charms Marshmallows (the name brand or an off brand), or you can buy a box of Lucky Charms cereal and pick out the shamrock marshmallows. Just note that the marshmallows may not look the same as the one in the pictures here because they’ve changed the look of the marshmallows since these pictures were taken.
- White frosting: Use white frosting so you can color it using food coloring. You can buy any brand, just know that some brands have “white ” frosting and some have “vanilla” frosting-either one will work.
- Green gel food coloring: Gel food coloring won't thin out the frosting. It is also easier to control compared to liquid food coloring so it will help you be more successful in getting the shade of green you want.
See recipe card for complete list of ingredients and quantities.
🔀 Substitutions
If you don't have the ingredients you need, see if you have these instead:
White cake mix: If you can’t find this, you can use vanilla, yellow or even funfetti cake mix instead. Also, if you prefer, you can make your own cake mix for the cupcakes.
Shamrock marshmallows: In case you can’t find just the shamrock marshmallows or don’t want to bother getting them out of the cereal box, use green mini marshmallows or regular mini marshmallows dipped in green sanding sugar.
White frosting: Vanilla buttercream, cream cheese frosting or whipped cream frosting would also work.
Green gel food coloring: If you only have liquid food coloring, you can use it, but you may need to use more to get the shade you want. For a natural alternative, use small amounts of matcha powder or spinach juice so it doesn’t affect the taste.
🌈Variations / Options / Add-Ins
These holiday cupcakes can easily be customized to fit your personal tastes.
Flavor variations: For mint chocolate cupcakes, use chocolate cake mix instead of white, and add 1 teaspoon of peppermint extract to the batter for a minty kick. For lemon-lime cupcakes, add 1 teaspoon lemon extract or lime zest to the cake batter and use lemon or lime frosting instead of vanilla.
Add-Ins: Add mini chocolate chips, chopped Andes mints or crushed Oreos to the cake batter. You can also mix in crushed Lucky Charms cereal to the frosting for a crunchy texture.
Additional decorations: Top with gold sprinkles or an edible gold leaf for a more luxurious look. Add mini rainbow candy belts, like Airheads Extremes Bites, draped over the frosting to look like a rainbow leading to the gold coin.
For another fun dessert with a pot of gold theme, try these Oreo St. Patrick’s Day treats.
🥄 Equipment Needed / Helpful Tools
You only need a few kitchen tools to help you make this easy recipe. So, gather these tools and get ready to enjoy this tasty dessert.
- Mixing bowl: You'll need a medium-sized mixing bowl to combine the ingredients for the cupcakes.
- Muffin tins: This is where you’ll bake the cupcakes. You’ll need two muffin tins because the recipe makes 24 cupcakes.
- Cupcake liners: You need 24 cupcake liners. Use a variety of colors to go with a rainbow theme or use St. Patrick’s Day liners.
- Piping bag and tip: This will make it easier to add the frosting to the cupcakes.
Tired of Ads?
Skip the distractions and get straight to the good stuff with Wonder Mom Premium!
As a member, you’ll enjoy:
✅ Ad-free browsing for a seamless recipe experience
✅ Printable kitchen guides & meal-planning tools
✅ Exclusive discounts & members-only freebies
Join today and make cooking stress-free!
🔪 How to Make These Easy Shamrock Cupcakes
These cupcakes are easy to make if you follow these simple instructions.
Would you like to save this?
Step 1: Preheat Oven and Prepare Pans
Preheat oven to temperature listed on the box. Line cupcake pans with cupcake liners.
Step 2: Prepare Batter
Prepare the cake batter according to the directions on the box.

Step 3: Fill Cupcake Liners
Fill each cupcake liner ⅔ full with batter.

Step 4: Add Marshmallow
Add one shamrock marshmallow to each cupcake liner on top of the batter.

Step 5: Bake Cupcakes
Bake the cupcakes according to the package directions.
Step 6: Cool and Prepare Frosting
Once baked (a toothpick inserted in the center should come out clean), remove cupcakes from the oven and set aside. Let them sit in the muffin tin for about 5 minutes, then place them on a wire cooling rack.
While the cupcakes are cooling (for best results, cool for 1 hour), prepare the frosting by mixing some of the green gel food coloring into the container of frosting. Add enough coloring to reach the hue you want.
Step 7: Frost the Cupcakes
Transfer the frosting to a piping bag and pipe the frosting onto each cupcake.

Step 8: Decorate
Add one shamrock marshmallow and one toy gold coin or chocolate coin to each cupcake.

Step 9: Serve and Enjoy
That’s it! Your shamrock cupcakes are ready to eat.

👩🍳 Pro Tips
Here are a few tips that you can use to make sure that your Shamrock Cupcakes turn out perfectly.
- Don’t overmix the batter. Mix just until combined to keep cupcakes light and fluffy. Overmixing can make them dense.
- To prevent sticking, use high-quality nonstick liners or lightly spray the liners with nonstick spray.
- Cool cupcakes completely. If you frost them when they're even slightly warm, the frosting will melt.
- Place decorations right after frosting so they stick well.
- Chill decorated cupcakes for 10-15 minutes to help the frosting set and prevent the decorations from sliding off.
❓ Recipe FAQs
Absolutely! Just reduce the baking time to about 10-12 minutes for mini cupcakes.
Yes! Bake the cupcakes 1-2 days in advance and store them in an airtight container at room temperature. Frost and decorate them just before serving for the freshest look.
Unfrosted cupcakes: Store in an airtight container at room temp for up to 2 days or refrigerate for 4-5 days.
Frosted cupcakes: Store in a covered container in the fridge for 3-4 days.
Let chilled cupcakes sit at room temp for 15-20 minutes before serving for the best texture.
🙏 Pairing
These are my favorite dishes to serve with these Easy Shamrock Cupcakes:


Ready to get cooking? Print off the recipe card below or toggle on Cook Mode to keep your screen from going dark while you follow along on your phone or tablet.
SAVE THIS RECIPE!
Enter your email below and I’ll send it straight to your inbox.
📋 Recipe

Easy Shamrock Cupcakes
Would you like to save this?
Equipment
- muffin tins
- Cupcake Liners
- Piping bag and tip
Ingredients
- 1 box white cake mix + ingredients required to make the cupcakes
- 48 shamrock marshmallows from a bag of Lucky Charms Marshmallows
- 1 container white frosting
- green gel food coloring
- 24 chocolate coins
Instructions
- Preheat oven to temperature listed on the box. Line cupcake pans with cupcake liners.
- Prepare cake mix according to package instructions.1 box white cake mix
- Fill each cupcake liner ⅔ full with batter.
- Add one shamrock marshmallow to each cupcake liner on top of the batter.48 shamrock marshmallows
- Bake the cupcakes according to the package directions.
- Once baked (a toothpick inserted in the center should come out clean), remove cupcakes from the oven and set aside. Let them sit in the muffin tin for about 5 minutes, then place them on a wire cooling rack.While the cupcakes are cooling (for best results, cool for 1 hour), prepare the frosting by mixing some of the green gel food coloring into the container of frosting. Add enough coloring to reach the hue you want.1 container white frosting, green gel food coloring
- Transfer the frosting to a piping bag and pipe the frosting onto each cupcake.
- Top each cupcake with one chocolate coin and one shamrock marshmallow.24 chocolate coins
- That's it! Your shamrock cupcakes are ready to eat.
Notes
Pro Tips
- Don't overmix the batter. Mix just until combined to keep cupcakes light and fluffy. Overmixing can make them dense.
- To prevent sticking, use high-quality nonstick liners or lightly spray the liners with nonstick spray.
- Cool cupcakes completely. If you frost them when they're even slightly warm, the frosting will melt.
- Place decorations right after frosting so they stick well.
- Chill decorated cupcakes for 10-15 minutes to help the frosting set and prevent the decorations from sliding off.
Recipe FAQs
Can I make mini cupcakes instead? Absolutely! Just reduce the baking time to about 10-12 minutes for mini cupcakes. Can I make these cupcakes ahead of time? Yes! Bake the cupcakes 1-2 days in advance and store them in an airtight container at room temperature. Frost and decorate them just before serving for the freshest look. How do I store these cupcakes? Unfrosted cupcakes: Store in an airtight container at room temp for up to 2 days or refrigerate for 4-5 days.Frosted cupcakes: Store in a covered container in the fridge for 3-4 days.
Let chilled cupcakes sit at room temp for 15-20 minutes before serving for the best texture.